
Lead Capture Forms for Websites: a Practical Setup Guide
Route form submissions directly into your CRM as contact records, filter spam, and give visitors a proper post-submit experience.
A lead fills out your contact form, gets an auto-reply thanking them for reaching out, and then nothing happens for three days. The submission landed in a shared inbox that five people are technically monitoring and none of them actually check. By the time sales finds it, the lead has talked to a competitor.
This is a pipeline problem, not a form problem. And it’s easier to fix than you think.
By the end of this guide, you’ll have a lead capture form that routes submissions directly into your CRM as contact records, filters spam before it pollutes your pipeline, and gives visitors a proper post-submit experience on your own domain, without writing any server-side code.
What a lead form actually needs to capture
A generic name-email-message form is built for a support inbox, not a sales pipeline. A lead form needs to give whoever follows up enough context to prioritize and route without having to email back and ask clarifying questions.
Four fields cover most B2B lead capture scenarios:
- An email field (required, using
type="email"for browser-level format validation) - A company or organization field (required; gives sales the B2B context they need)
- An interest or intent dropdown (routes the lead to the right person or queue)
- A freeform message field (optional, can help with qualification)
You should skip the phone number field unless your sales process involves calls. Each field that doesn’t affect how you route or follow up costs you leads and gives you nothing back. Research from Venture Harbour found that context and motivation drive completion more than length alone, but fields that serve no downstream purpose still reduce completions without giving you anything back.
The name attribute on each field matters. It becomes the key in the JSON your CRM receives. You should always name them descriptively (company, interest, message) rather than generically (field2, input_3), or you’ll spend time remapping keys in every integration you configure.
Here’s a quick example:
  <form>
    <input type="email" name="email" placeholder="Work email" required />
    <input type="text" name="company" placeholder="Company name" required />
    <select name="interest" required>
      <option value="">What are you looking for?</option>
      <option value="pricing">Pricing info</option>
      <option value="demo">Product demo</option>
      <option value="partnership">Partnership</option>
    </select>
    <textarea name="message" placeholder="Anything else? (optional)"></textarea>
    <button type="submit">Get in touch</button>
  </form>
Where submissions go
There are three common approaches to handle the POST request:
- Email forwarding is the simplest: a service receives the submission and forwards it to an inbox. This works at low volume, but leads that live in inboxes lose the structured data you just captured. There’s no deduplication, no routing by intent, and no record that survives the next inbox cleanup.
- A full custom backend gives you complete control, but requires a server, CORS handling, and ongoing maintenance for something that isn’t your core product.
- A form backend service sits between those two options. It handles the POST endpoint, stores submissions, and forwards them to webhooks, CRM plugins, or email addresses without any server code on your end. You can also configure all of it from a dashboard rather than deploy configuration.
Formspree handles all of this. Adding it to the form above is one attribute change.
  <form action="https://formspree.io/f/YOUR_FORM_ID" method="POST">
    <input type="email" name="email" placeholder="Work email" required />
    <input type="text" name="company" placeholder="Company name" required />
    <select name="interest" required>
      <option value="">What are you looking for?</option>
      <option value="pricing">Pricing info</option>
      <option value="demo">Product demo</option>
      <option value="partnership">Partnership</option>
    </select>
    <textarea name="message" placeholder="Anything else? (optional)"></textarea>
    <button type="submit">Get in touch</button>
  </form>
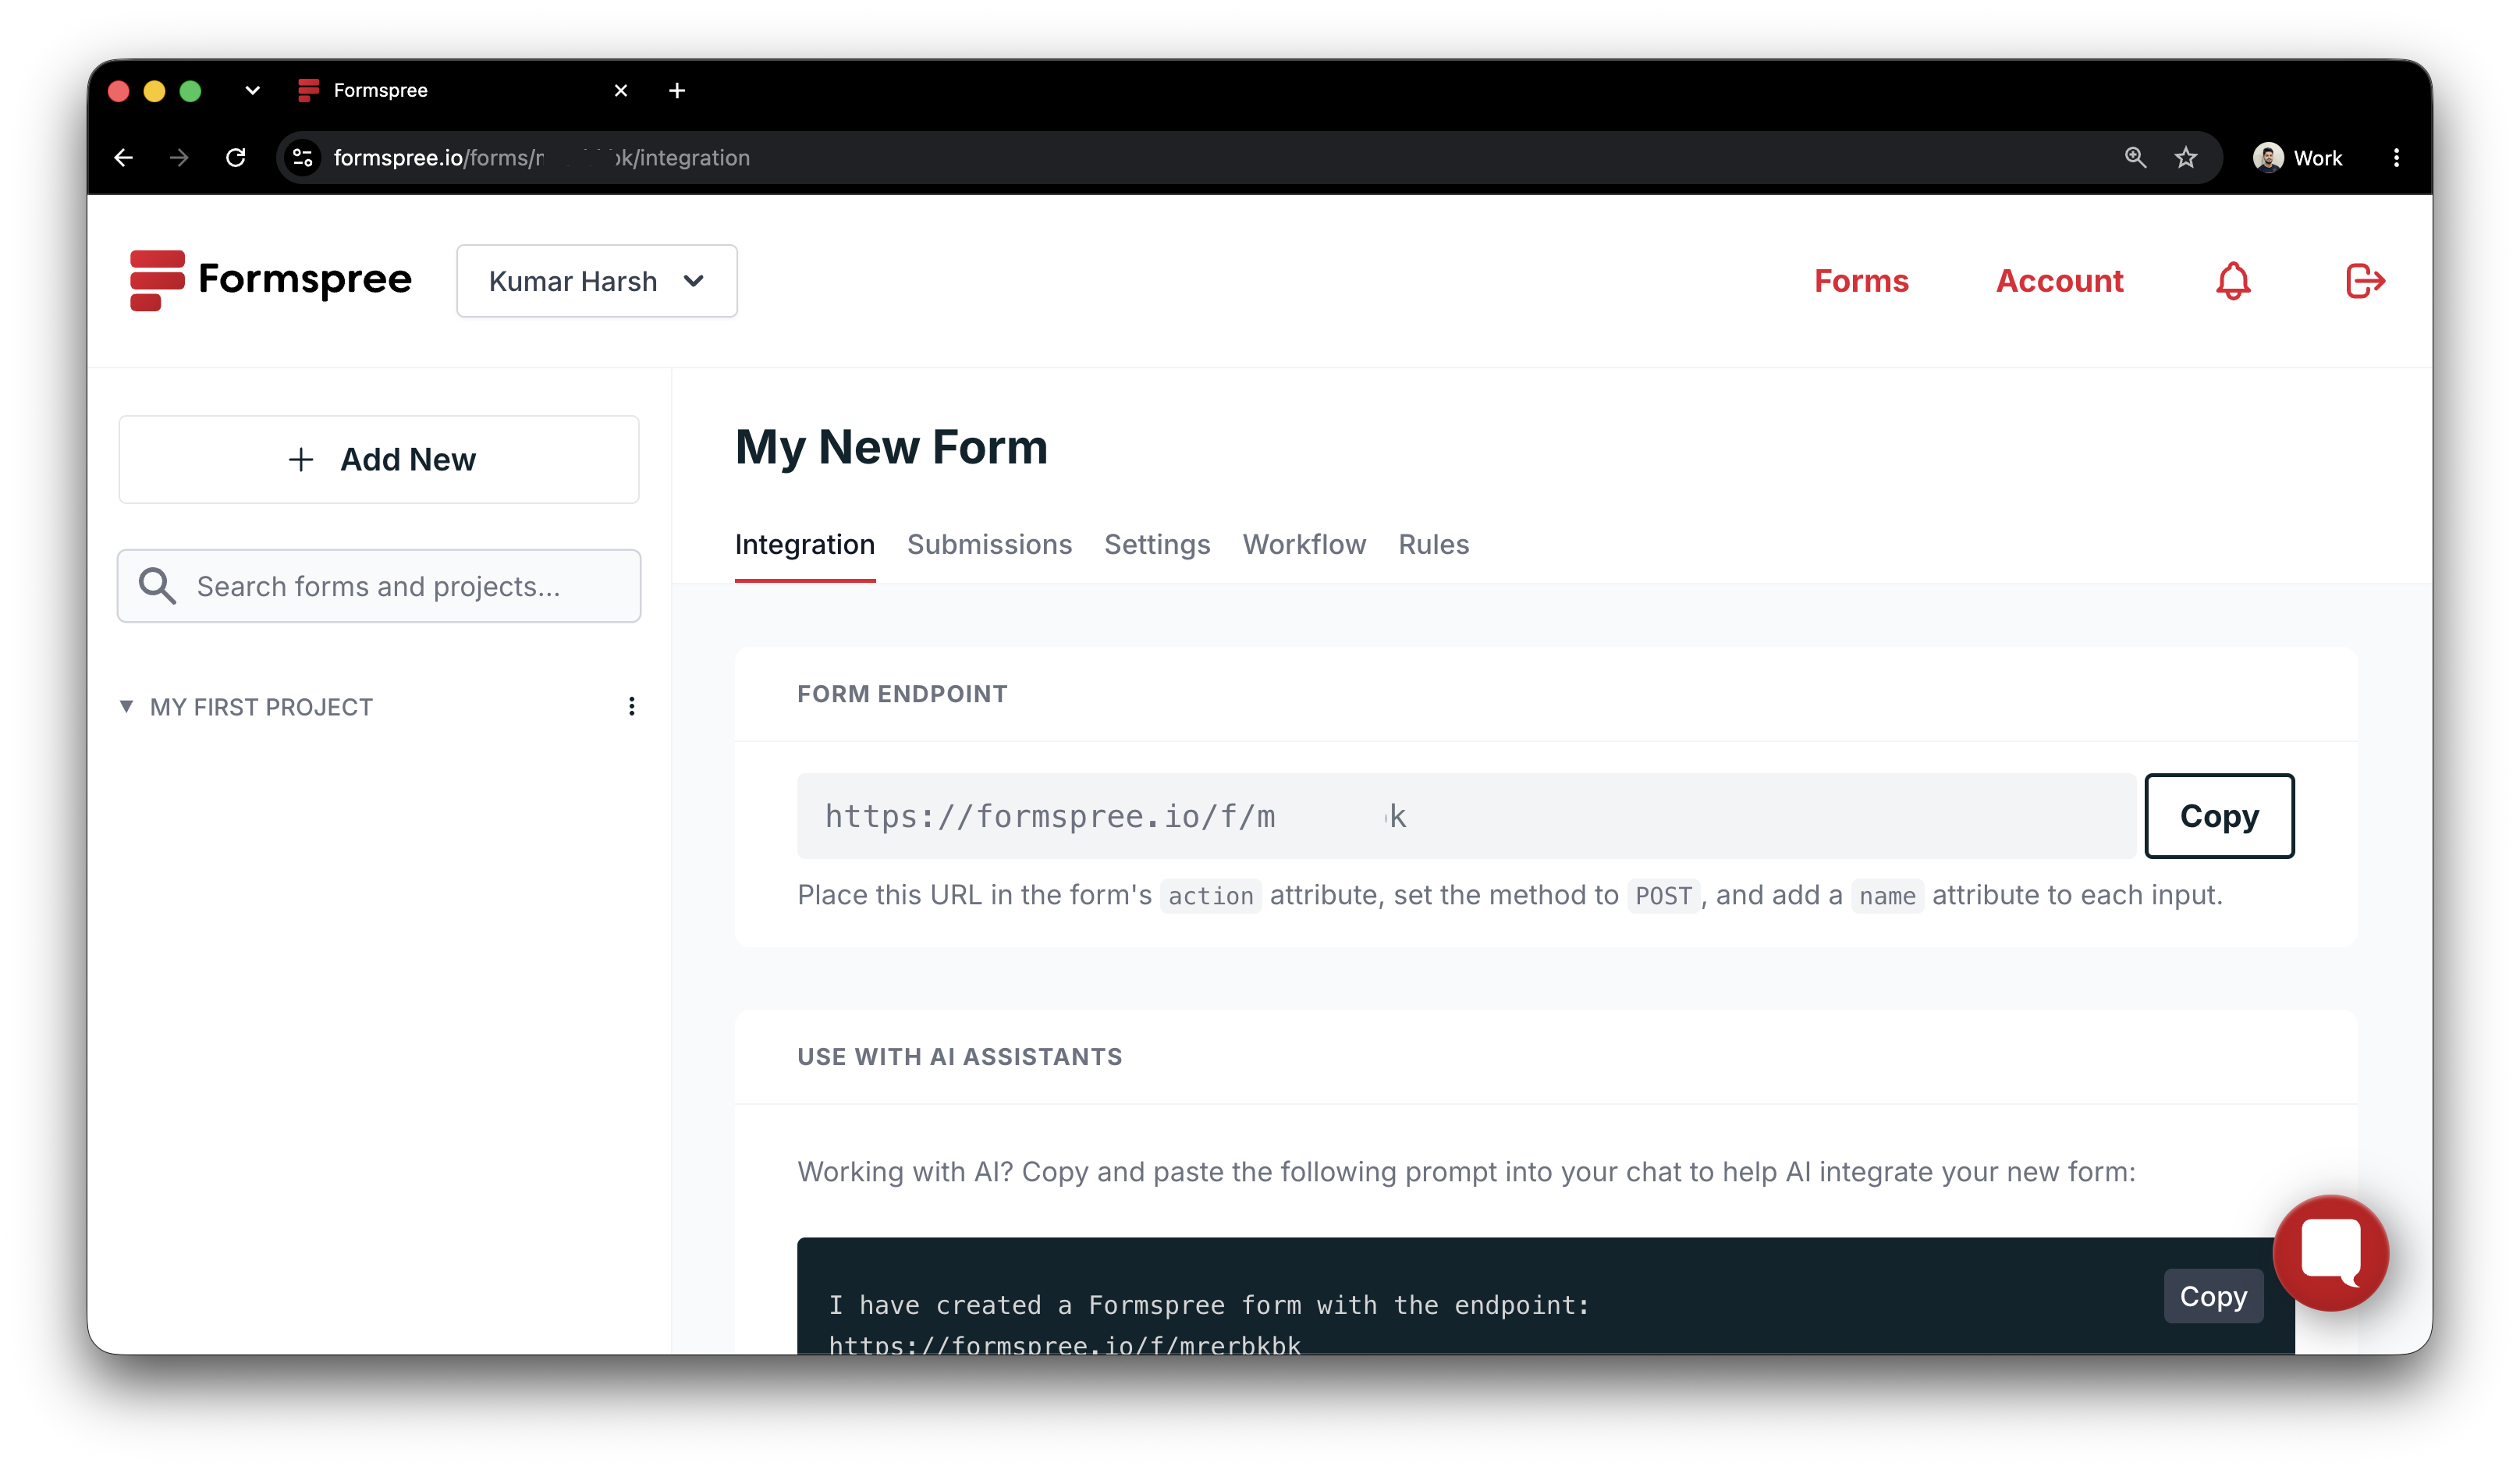
Create a new Formspree form to get your ID. Paste it in and the endpoint is live. You can configure what happens to each submission from here in the dashboard.
Connecting to your CRM
Every CRM has some way to accept data from outside: a native integration, a webhook endpoint, or an automation platform that bridges the two. Which path you take depends on what your CRM supports.
Native plugins
For the most common tools, native plugins handle the routing directly. Formspree has built-in integrations for HubSpot, Pipedrive, and Salesforce on the CRM side, and for Mailchimp, Klaviyo, Kit, MailerLite, and Constant Contact on the email marketing side. You configure them from the form’s Workflow tab, map your form fields to the destination’s fields, and submissions flow through automatically with retries on failure.
The HubSpot plugin is a good example of how the field mapping works. After connecting your HubSpot account from the Workflow tab, Formspree automatically maps standard field names to their HubSpot counterparts without any extra configuration. A field named email becomes the contact’s email (and is the key Formspree uses to deduplicate; if the address already exists in HubSpot, the contact is updated rather than duplicated). Fields named company, phone, name, address, city, state, zip, and website map automatically as well.
For any other fields, Formspree matches by internal property name. So a form field named jobtitle maps to HubSpot’s jobtitle property, and a field named hs_lead_status maps to lead status. You can find internal property names in HubSpot under Settings > Properties, in the “Internal name” column. For the interest field from the form above, you’d create a custom contact property in HubSpot, note its internal name, and name the form field to match.
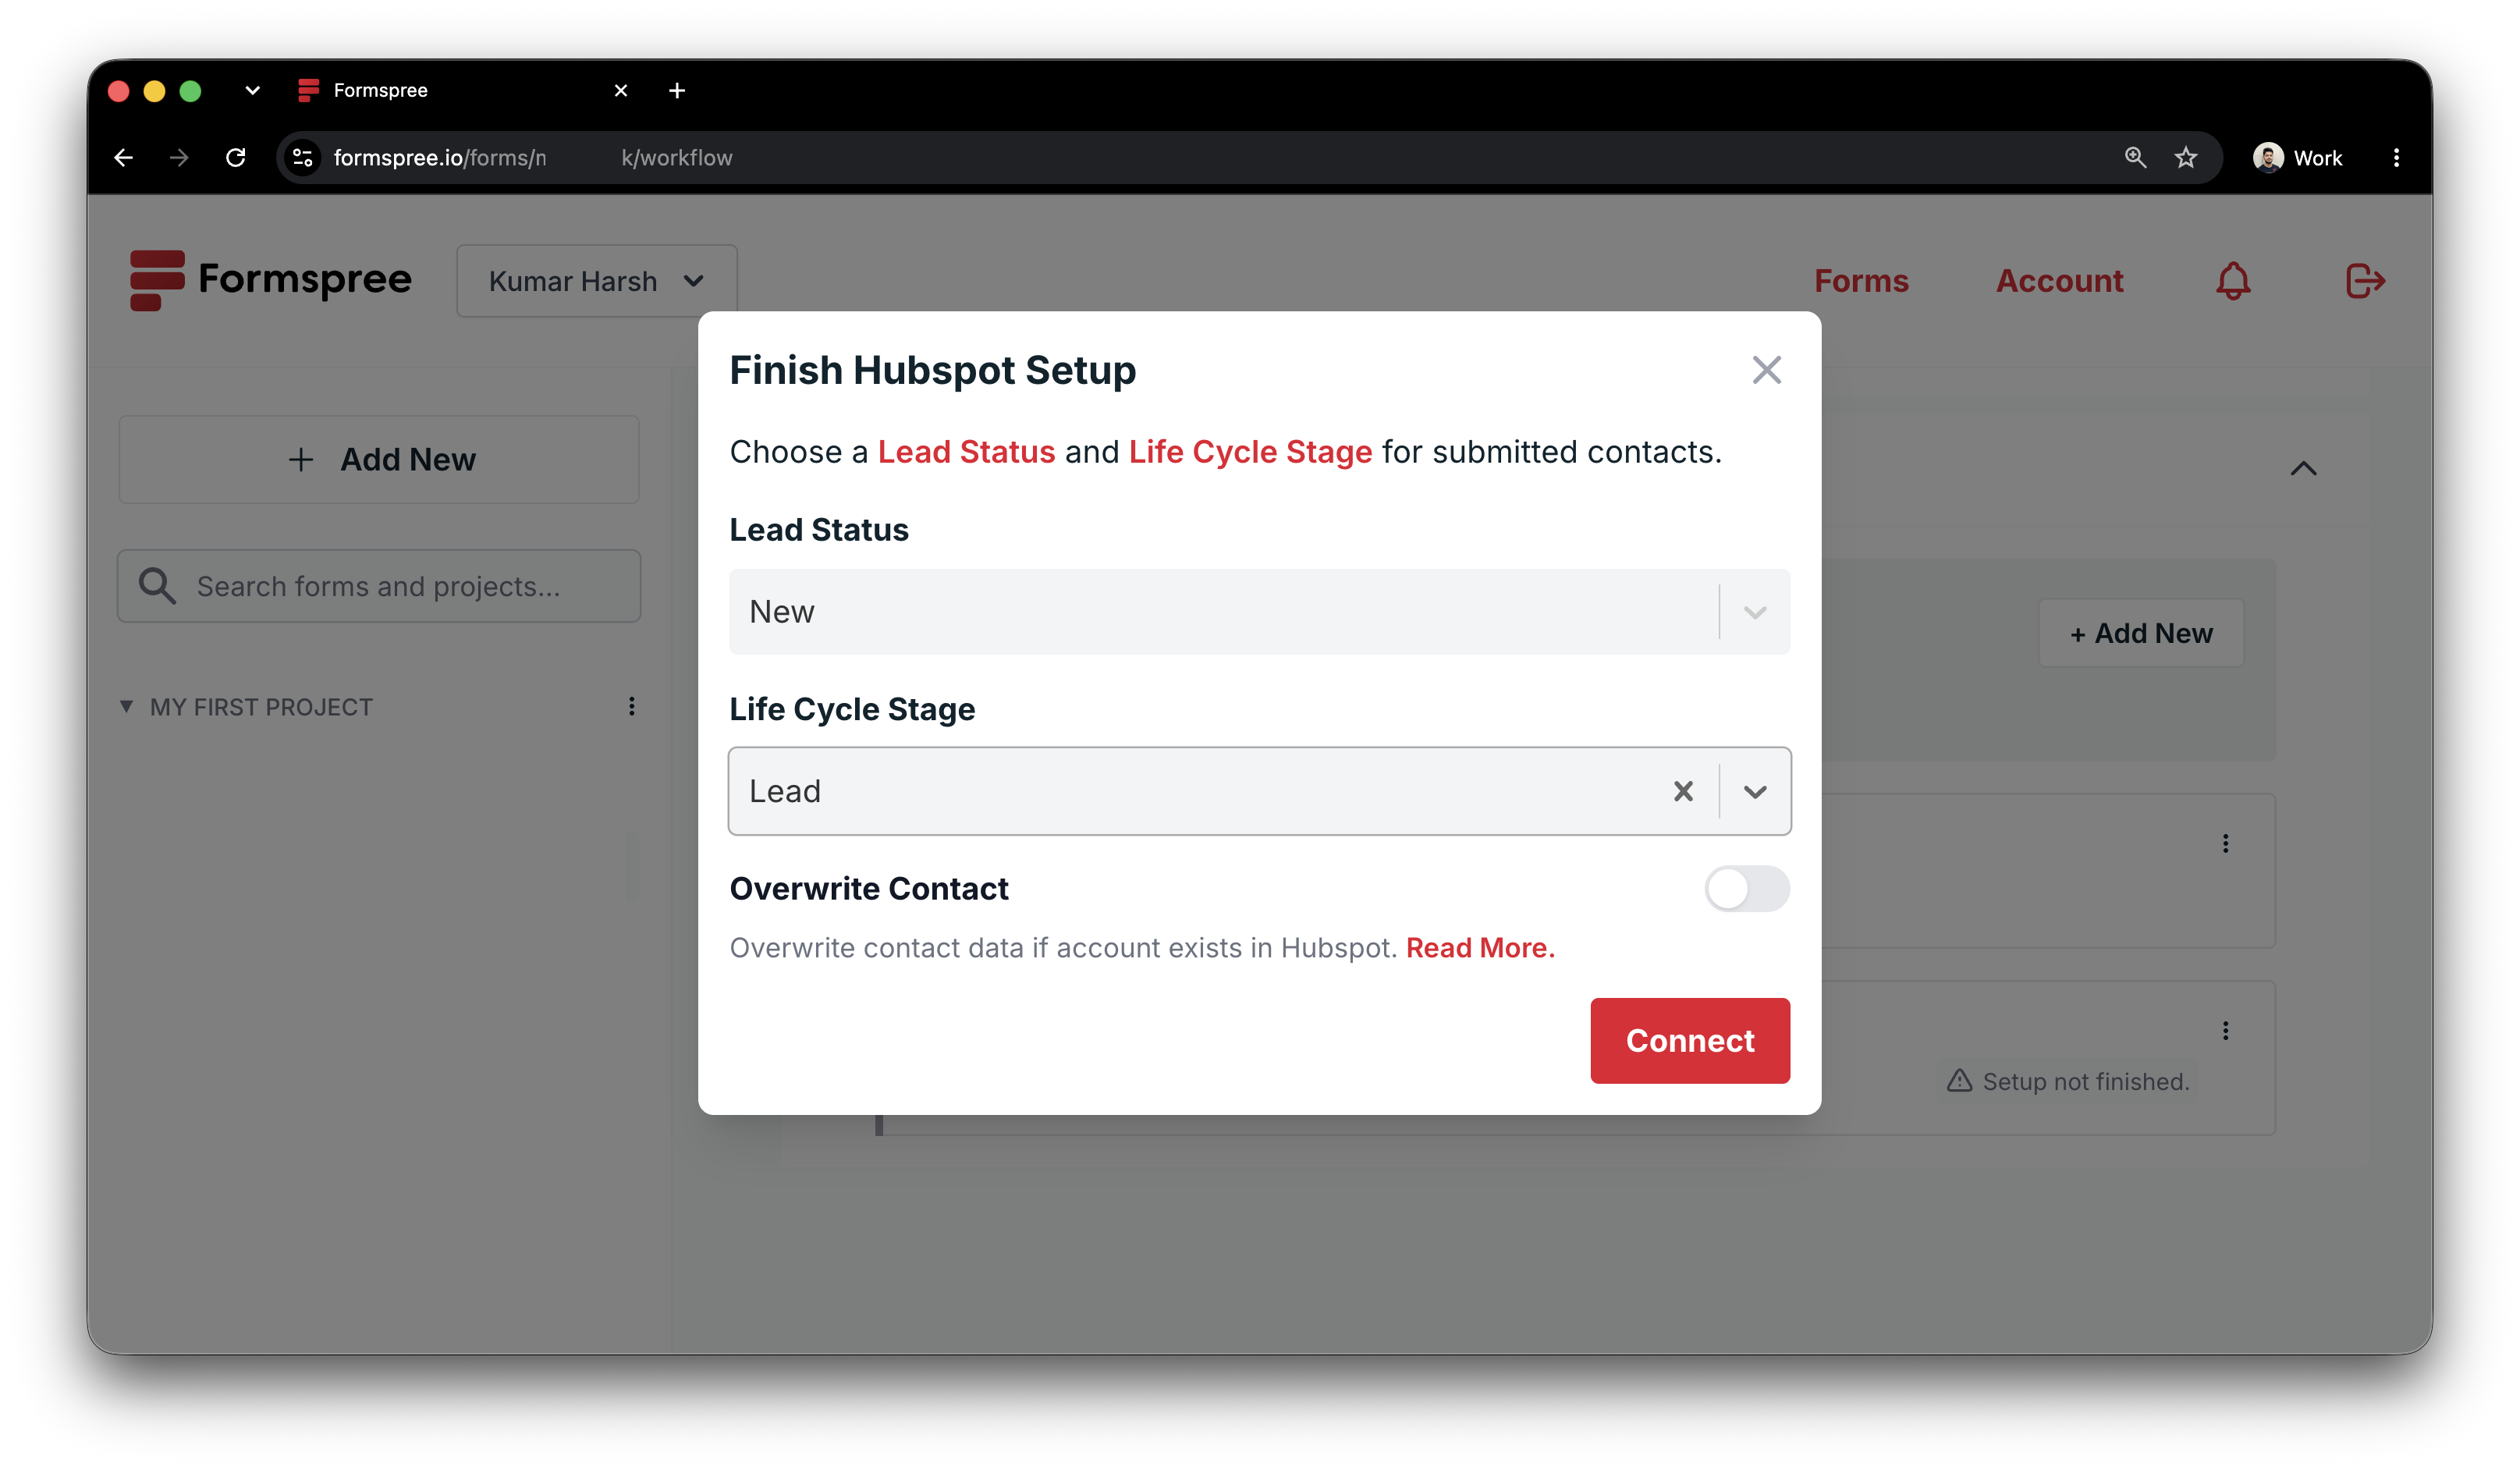
The plugin also lets you set a default Lead Status and Life Cycle Stage for all contacts created through the form. This is useful for routing them into the right HubSpot workflow automatically without relying on manual triage. For a full walkthrough that pairs the HubSpot plugin with Slack alerts, see The Lead Capture Stack.
For Mailchimp, the equivalent is mapping email to the subscriber address and using the interest value to apply a tag. Adding every lead to a generic newsletter list discards the intent data you just captured. Tag by interest so the first email they receive is relevant to what they asked about.
Webhooks for custom pipelines
If your CRM isn’t covered by a native plugin, or you need to run custom logic before a record gets created, the webhook plugin sends a JSON POST to any endpoint you specify on each submission.
Each submission should trigger a POST to that endpoint. The body would contain a submission object with your field values, a keys array preserving submission order, and a _date timestamp added automatically:
  {
    "form": "your-form-id",
    "keys": ["email", "company", "interest", "message"],
    "submission": {
      "_date": "2026-06-19T14:23:00",
      "email": "someone@example.com",
      "company": "Acme Corp",
      "interest": "demo",
      "message": "Can we schedule a call next week?"
    }
  }
You can point this at a Zapier “Catch Hook” trigger to route into any tool in Zapier’s catalog. The action step will map the JSON fields to CRM properties. “Create or Update Contact in HubSpot” maps email to Contact Email, company to Company Name, and interest to whatever custom property you’ve set up.
Some tools (Airtable, Pipedrive, and Salesforce with the right configuration) accept webhook POSTs directly without middleware. If yours does, paste the inbound webhook URL from the CRM directly into Formspree’s webhook configuration.
What happens after submission
What happens after submission shapes lead quality as much as the form itself.
Redirect to your own page
By default, Formspree shows a confirmation page on the Formspree domain — an unfamiliar URL with no context about what happens next.
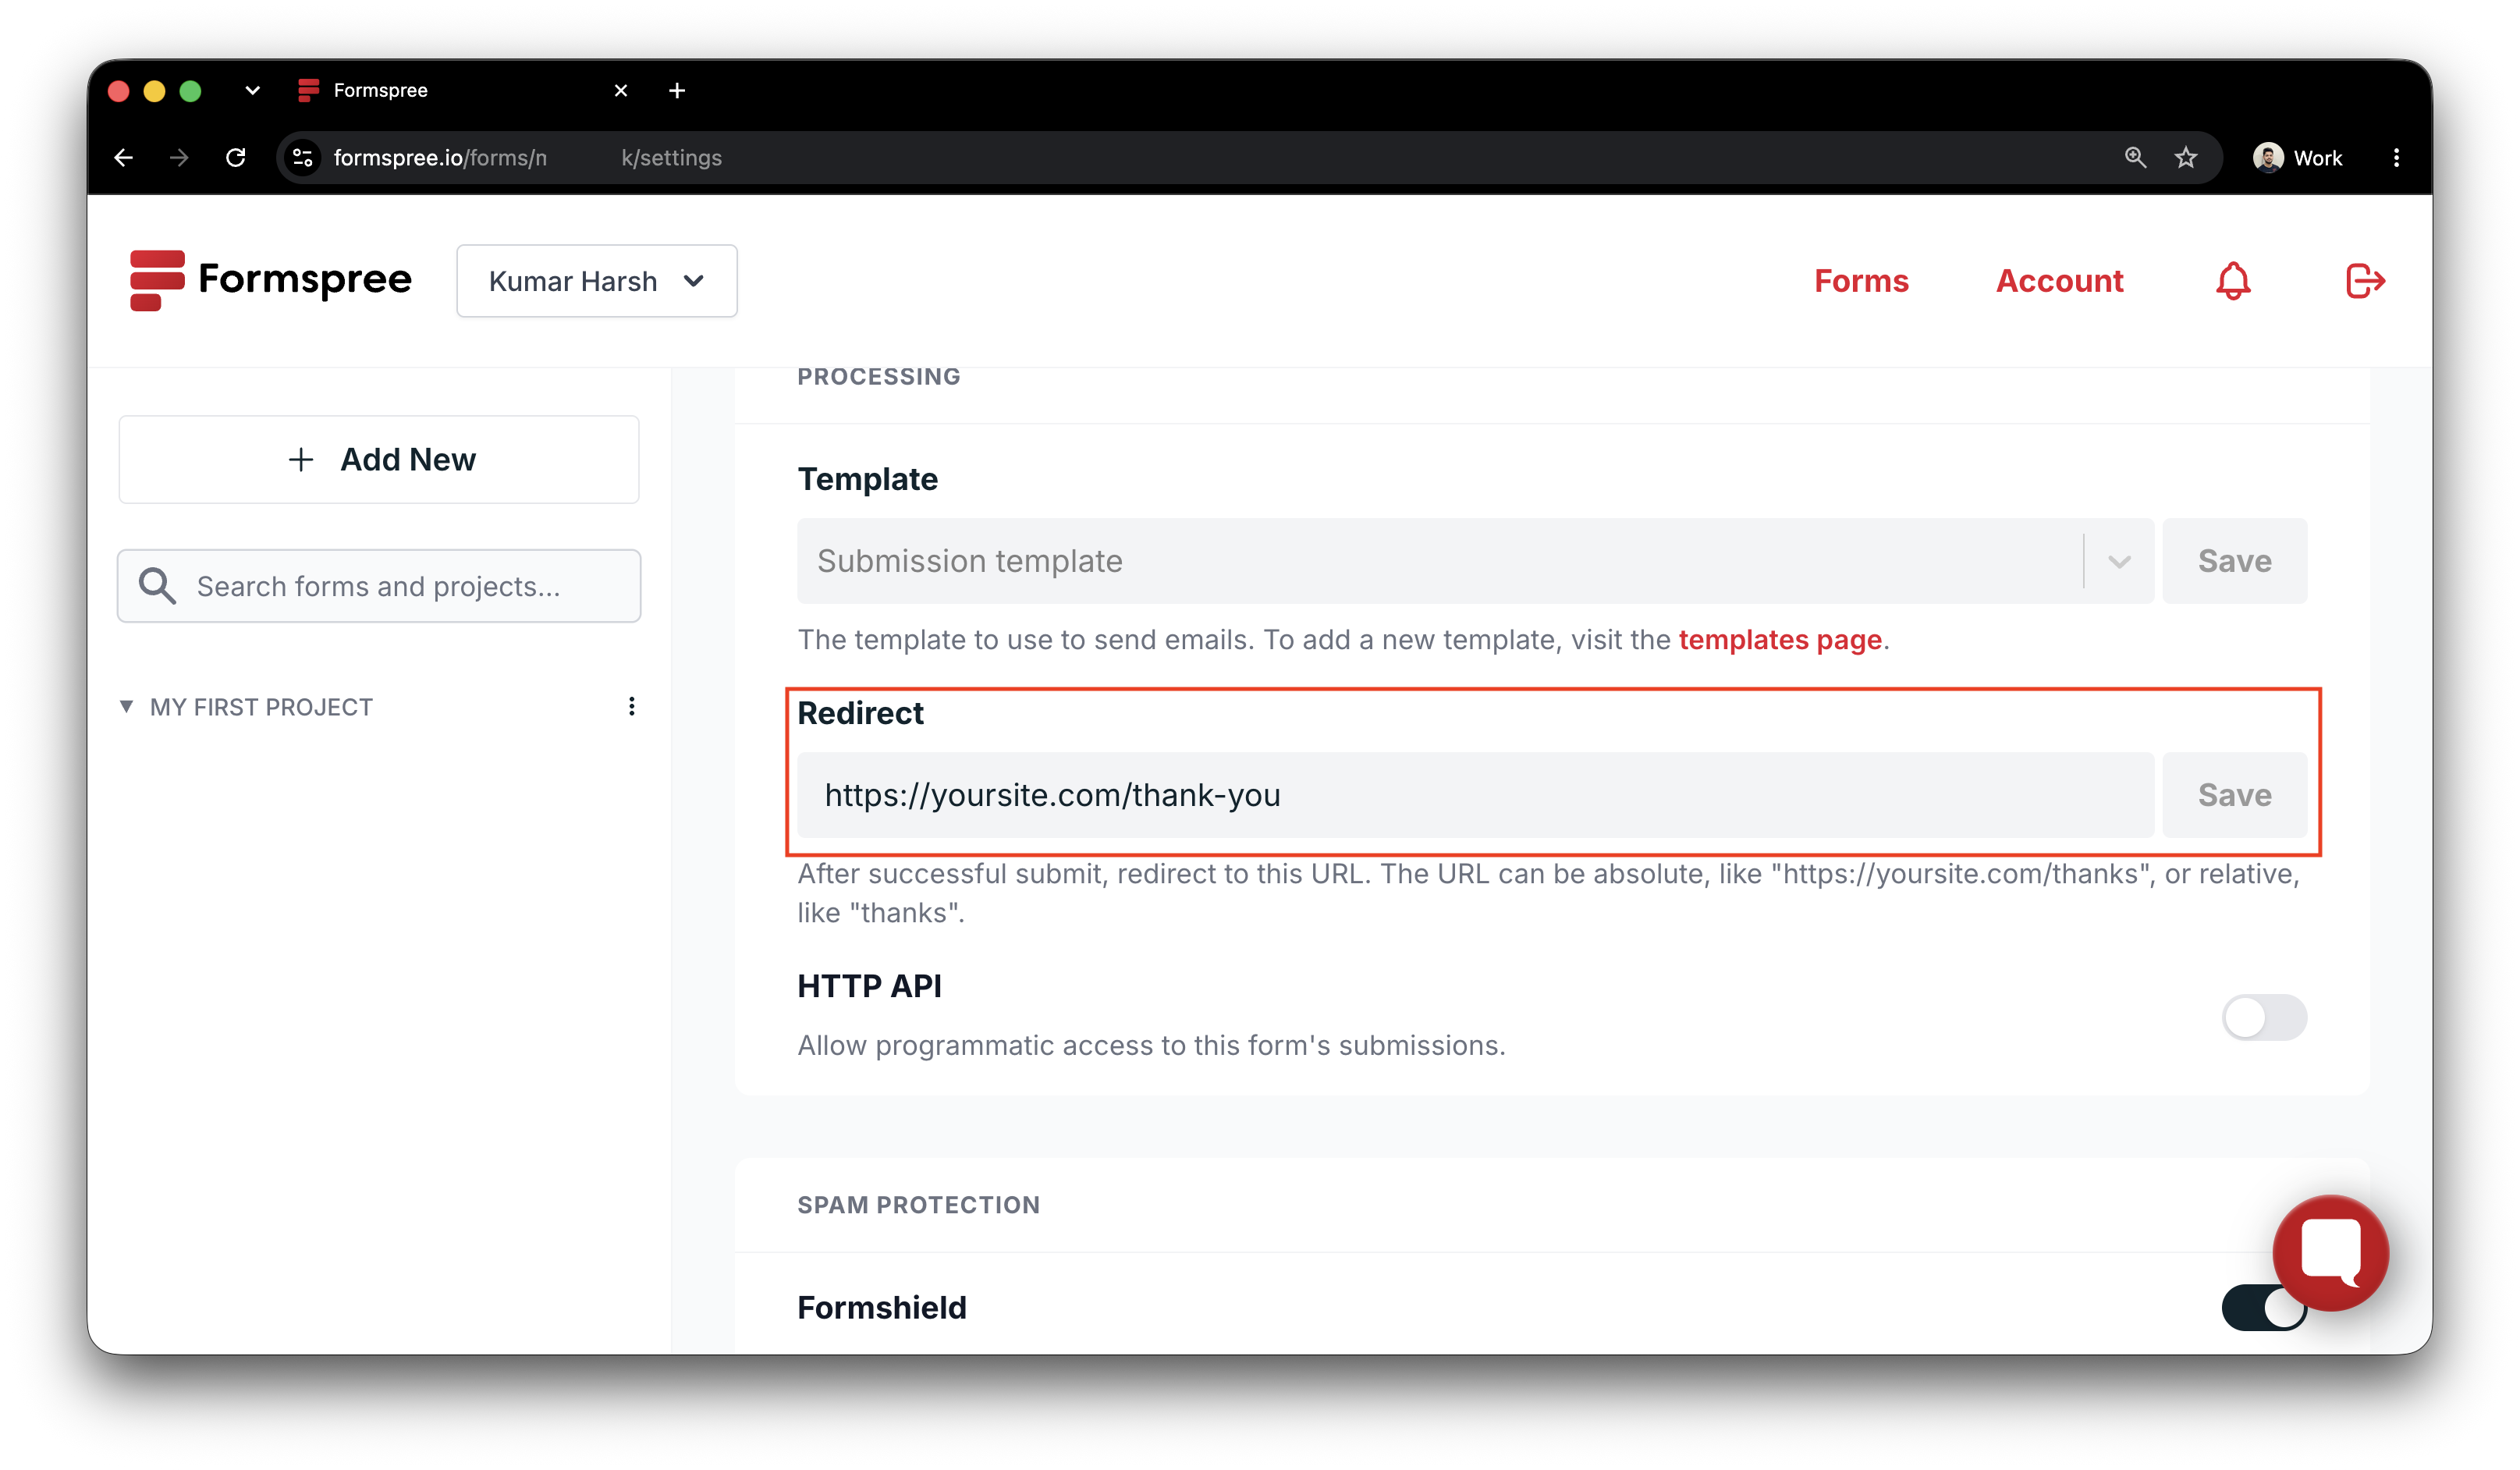
You set the redirect URL in the form’s Settings tab in the Formspree dashboard, under the redirect option. Every successful submission then sends the visitor to that URL on your own site rather than to Formspree’s thank-you page.
The thank-you page should tell the visitor what actually happens next, not just confirm the form was received. “We’ll follow up within one business day” is more useful than “Got it!” If the lead selected “demo” as their interest, add a calendar embed or Calendly link on this page. That’s where a form submission becomes a booked meeting — before anyone on your team sends a single email.
Email notification subjects
If you’re forwarding submissions to an email address alongside the CRM integration (useful while verifying the pipeline is working), the default notification subject is “New submission from [your form name].” When submissions share an inbox, the default subject tells you nothing at a glance.
A hidden input named subject sets a custom subject line, with {{ field_name }} syntax for interpolating any submitted value:
<input type="hidden" name="subject" value="New lead: {{ interest }}" />
Formspree substitutes {{ interest }} with the actual submitted value, so the notification arrives as “New lead: demo” or “New lead: pricing.” With multiple people sharing a notification inbox, that’s the difference between triaging in seconds and opening each email to find out what it contains.
Keeping spam out of your CRM
A lead form on a page with real SEO traffic will attract automated submissions. Junk contacts that reach your CRM skew pipeline metrics and create cleanup work.
Honeypot field
A field hidden from human visitors with CSS that bots often fill. Formspree discards any submission where this field is non-empty:
<input type="text" name="_gotcha" style="display:none" tabindex="-1" autocomplete="off" />
This catches unsophisticated automation that auto-fills every field it finds on a page. It carries zero false-positive risk: a human can’t fill a field they can’t see. For a breakdown of what honeypots, domain restriction, and CAPTCHAs each do and don’t catch, see Frontend-Only Spam Filtering.
Backend filtering
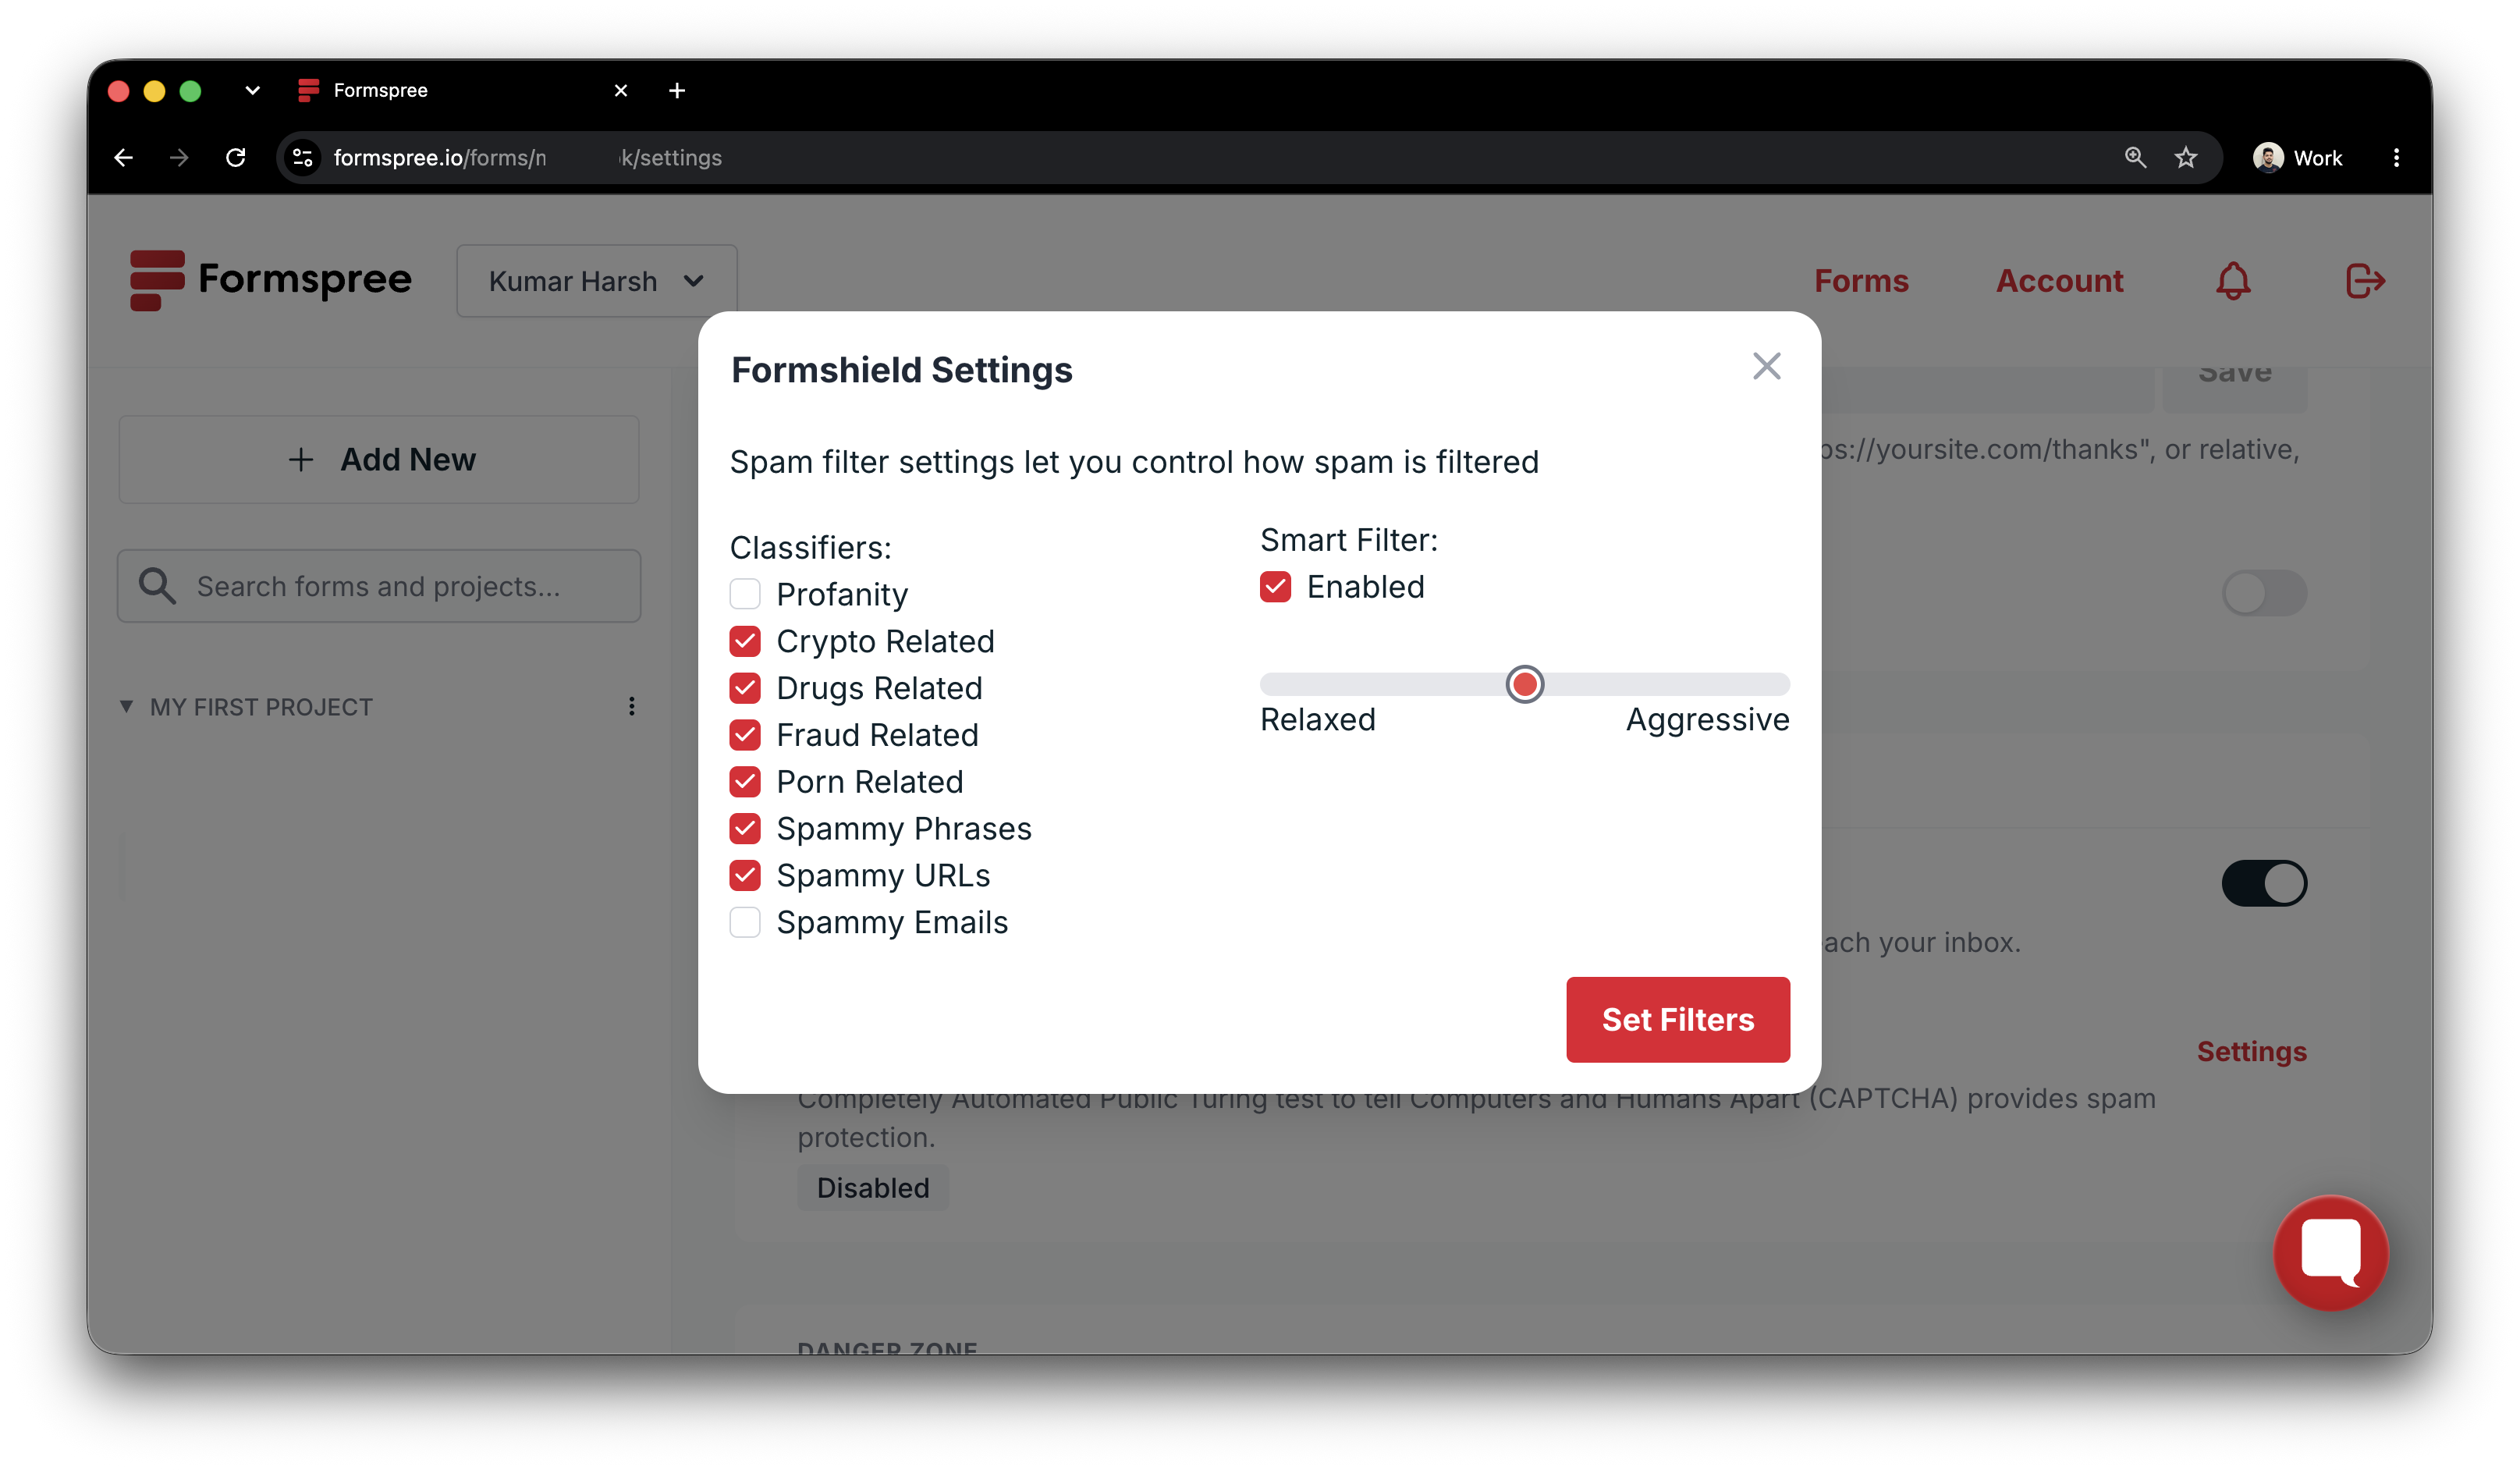
For forms with real traffic volume, a honeypot handles only the lowest-effort automation. Formspree’s Formshield layer runs each submission through a model trained on patterns across all the forms it processes. It identifies coordinated spam campaigns and template-based submissions that would be invisible looking at any single form’s history.
The sensitivity is configurable in the dashboard. For a lead form, “Aggressive” is the right default: false positives (real leads blocked) are less common than people expect, and cleaning up even a few days of spam contacts from a CRM is genuinely tedious.
The full pipeline
What you’ve built: form fields with descriptive names that survive the trip into your CRM, a POST endpoint that handles routing and retries, a redirect to a real page on your domain, and spam filtering that runs before anything reaches your contact list.
The failure mode described at the top isn’t a form problem — it’s a routing problem. A lead form without a structured destination is a form that collects data and then loses it. The integration you configure around the endpoint is what turns a filled-out form into an actionable contact record.