How to Create a File Upload Form to Collect Photos, Documents, and More
Part of the
Getting Started with Formspree
Series
File upload forms help businesses get valuable information, whether it’s a photo for a product review or documents for a job application. The alternative is usually email, where you’re likely to lose track of files in countless threads or a bottomless inbox.
Luckily, it’s easy to include a file upload in your HTML form with a few lines of code. The harder part—accepting the file, scanning the submission for spam, and storing it—is all handled on the back end by Formspree.
To demonstrate how you can create your own file upload form, we’ll use the example of Seltz, a fictional small business that lets you customize the carbonation of your seltzer water. They’re offering customers the chance to design their own seltzer cans by submitting an online form. Customers will upload the image they want on their can and submit the form. Then, Seltz will send them a preview of their design before shipping out their custom seltzer six-pack.
Here’s how it’s done:

Step 1: Start with a base HTML form.
Before you add the file upload component to your form, code the HTML base. If you need help, start with some code from our free form library, and check out this blog post with instructions on coding forms for beginners.
Seltz’s submission form needs fields for name, email, file upload, and the submit button. We changed the text on the button to read “Preview Your Seltzer.” Here’s what the code looks like before we add the file upload component:
  <form id="fs-frm" name="file-upload-form" accept-charset="utf-8" action="https://formspree.io/FORM_ID" method="post">
    <fieldset id="fs-frm-inputs">
      <label for="full-name">Full Name</label>
      <input type="text" name="name" id="full-name" placeholder="First and Last" required="">
      <label for="email-address">Email Address</label>
      <input type="email" name="_replyto" id="email-address" placeholder="email@domain.tld" required="">

  ------placeholder for file upload------

      <input type="hidden" name="_subject" id="email-subject" value="File Upload Form Submission">
    </fieldset>
    <input type="submit" value="Preview Your Seltzer">
  </form>
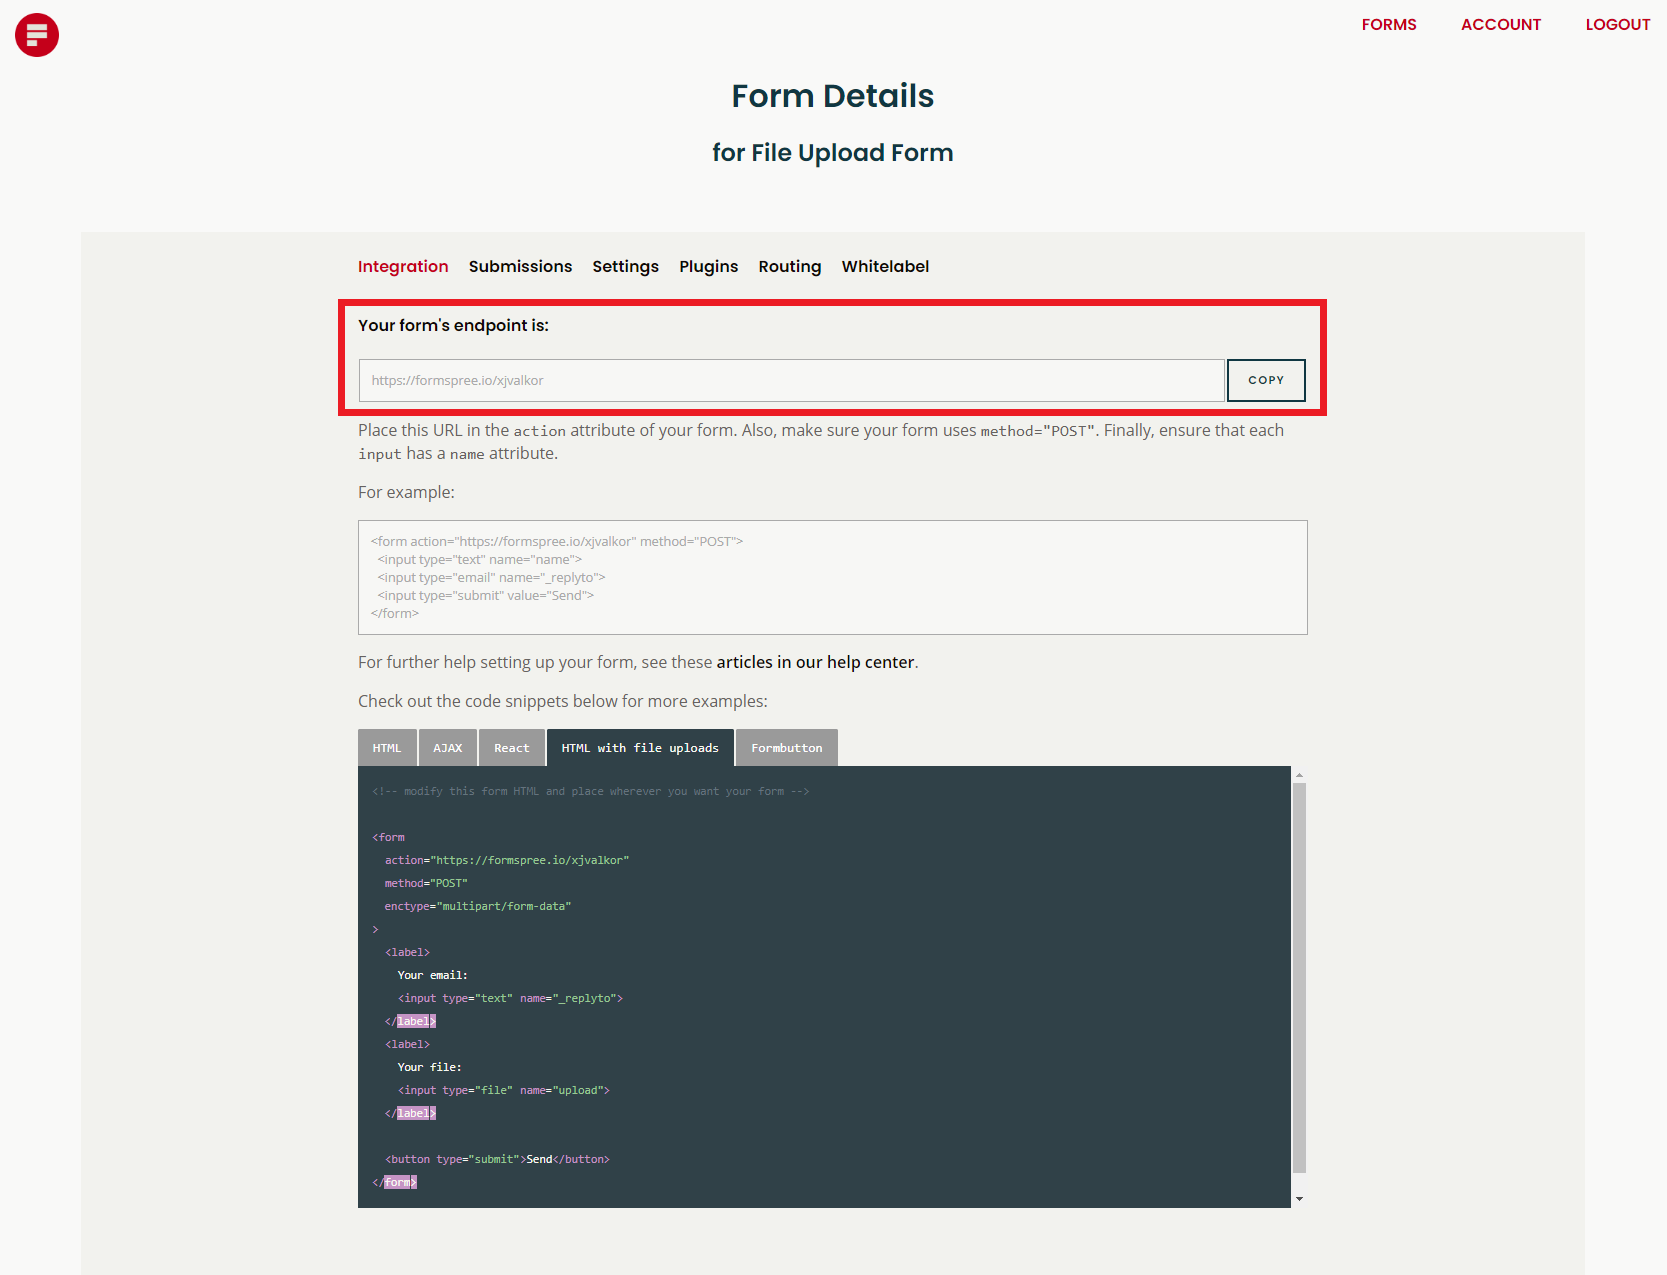
If you use Formspree to manage the back end of your form, replace the FORM_ID with a unique Formspree end point. Within your account, click + New Form, name the form, and then go to the Integration tab.
Step 2: Add the file upload code.
With just a few more lines of code, your HTML form can handle uploads of any file kind and size.
Add an enctype="multipart/form-data" attribute after the method="POST" attribute in the <form> tag so the opening form HTML will look like this:
  <form id="fs-frm" accept-charset="utf-8"
    action="https://formspree.io/xzbjawgz/FORM_ID"
    method="POST"
    enctype="multipart/form-data"
  >
This tells your browser to encode the form in binary because it has a file, instead of encoding as straight text as you would with all other forms.
Then, add these <label> and <input> fields where you want the file upload to appear in your form:
  <label for="upload"> Your file:</label>
  <input type="file" name="upload">
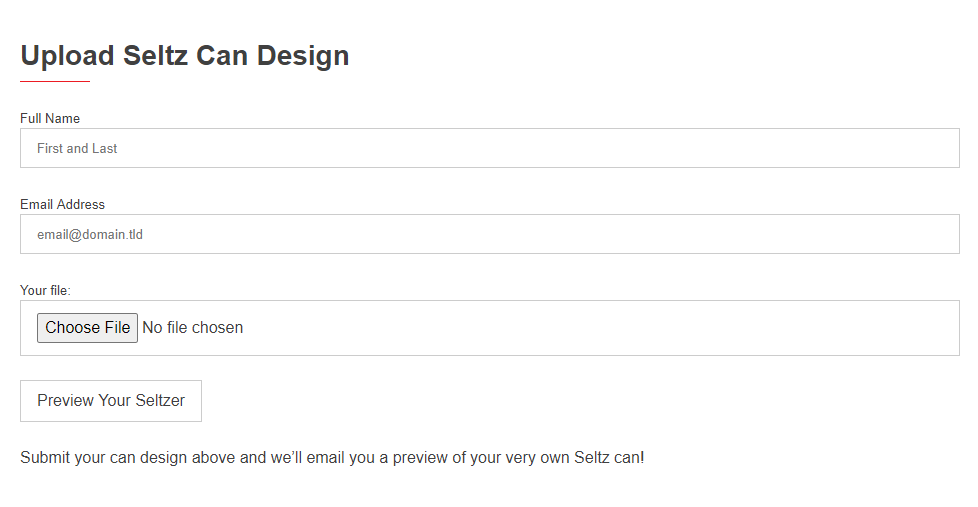
The form, when installed on the Seltz site, looks like this:
Step 3: Test your file upload form.
Run a couple of tests by submitting the form yourself with a file. If there’s an issue, you’ll get an error message pinpointing the problem. If all goes well, the file upload form submissions will appear in your account, like so:
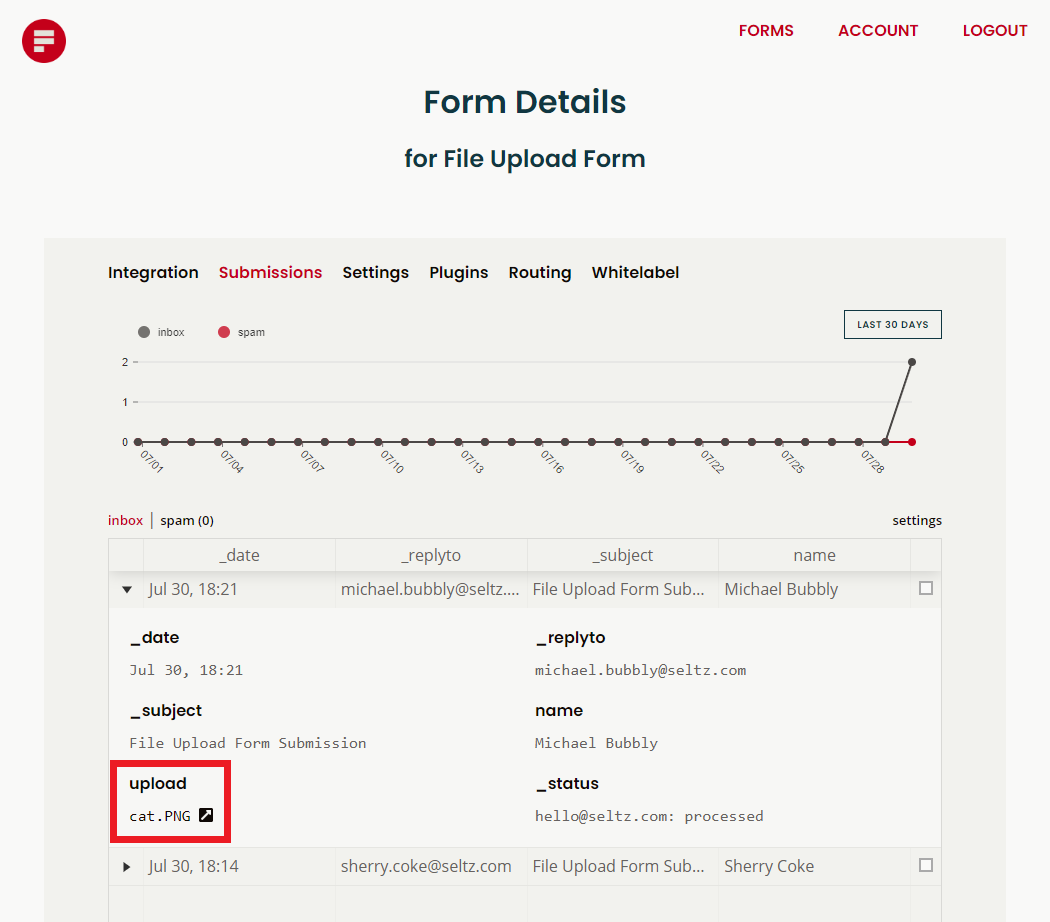
Clicking the file name, highlighted in the red box above, will download the file. Formspree hosts all of the uploaded files and form submissions so that you don’t have to. We also screen the submissions for spam and send likely offenders to a separate folder in your account. Learn more about spam protection here.
Up(load) and Away
Formspree doesn’t just host all of your file upload form submissions; we also allow you to build your own workflow. You can organize your form responses in Google Sheets, Airtable, or Trello. Or nurture leads with HubSpot and ConvertKit. Or sign people up for your Mailchimp newsletter, create support tickets in Zendesk and collect payments with Stripe. The form is just the beginning.