
Build a Notion CRM with Formspree in 10 Minutes
Automatically send form submissions to a Notion database without writing backend code.
A Notion database makes a surprisingly good lightweight CRM, complete with with custom fields, views, and filters that match exactly how you think about your pipeline — without paying $50 to $100 a month for a contact timeline, lead scoring engine, and activity feed you might never end up using.
The piece that makes it work like a traditional CRM is getting contact form submissions into Notion automatically, without copy-pasting anything. That’s where Formspree comes in. Connect your form to Notion via Formspree’s Notion integration and every submission creates a new row in your database automatically.
By the end of this guide you’ll have a live Notion database that receives contact form submissions from your site, organized with a status pipeline you can filter and sort without touching a spreadsheet again.
Design the schema first
The database schema is the part worth thinking about before you touch Formspree and Notion, because it will determine the fields that show up in your form and the data that you ultimately end up collecting.
Consider these properties:
- Name (could map to the default Title property in Notion)
- Email (could use Notion’s Email property type, which makes addresses clickable)
- Company (Text)
- Message (Text)
- Submitted At (Date & Time)
- Status (Could use Notion’s Status property type, with options: New, Contacted, Qualified, Closed)
- Source (Select)
The Status property should default to “New” so every incoming submission starts in the right pipeline stage without manual work. You can set a default value in the property settings.
The Source property is worth adding even if you only have one form right now. Once you run multiple forms (a contact page, a quote request page, a scheduling link), you’ll want to filter your database by where leads are coming from. Setting it up from the start costs nothing.
Always remember to keep the schema lean. Research from Baymard Institute consistently shows that form length is one of the primary drivers of abandonment, so something like a 12-property Notion database with 12 required form fields defeats the purpose.
Connect Formspree to Notion
You’ll need a Formspree account on the Personal plan or higher for the Notion integration. Once you’re in, create a new form from the dashboard. Then open the form settings and navigate to the Workflow tab.
Under the Actions section, click on the + Add New button. Select Notion from the popup and click Connect. Formspree redirects you through Notion’s OAuth flow, which asks you to authorize access to your workspace. The authorization flow lets you scope Formspree’s access to a custom set of pages rather than your entire workspace.
Make sure you select a Notion page before moving ahead. This is where your CRM database will get created:
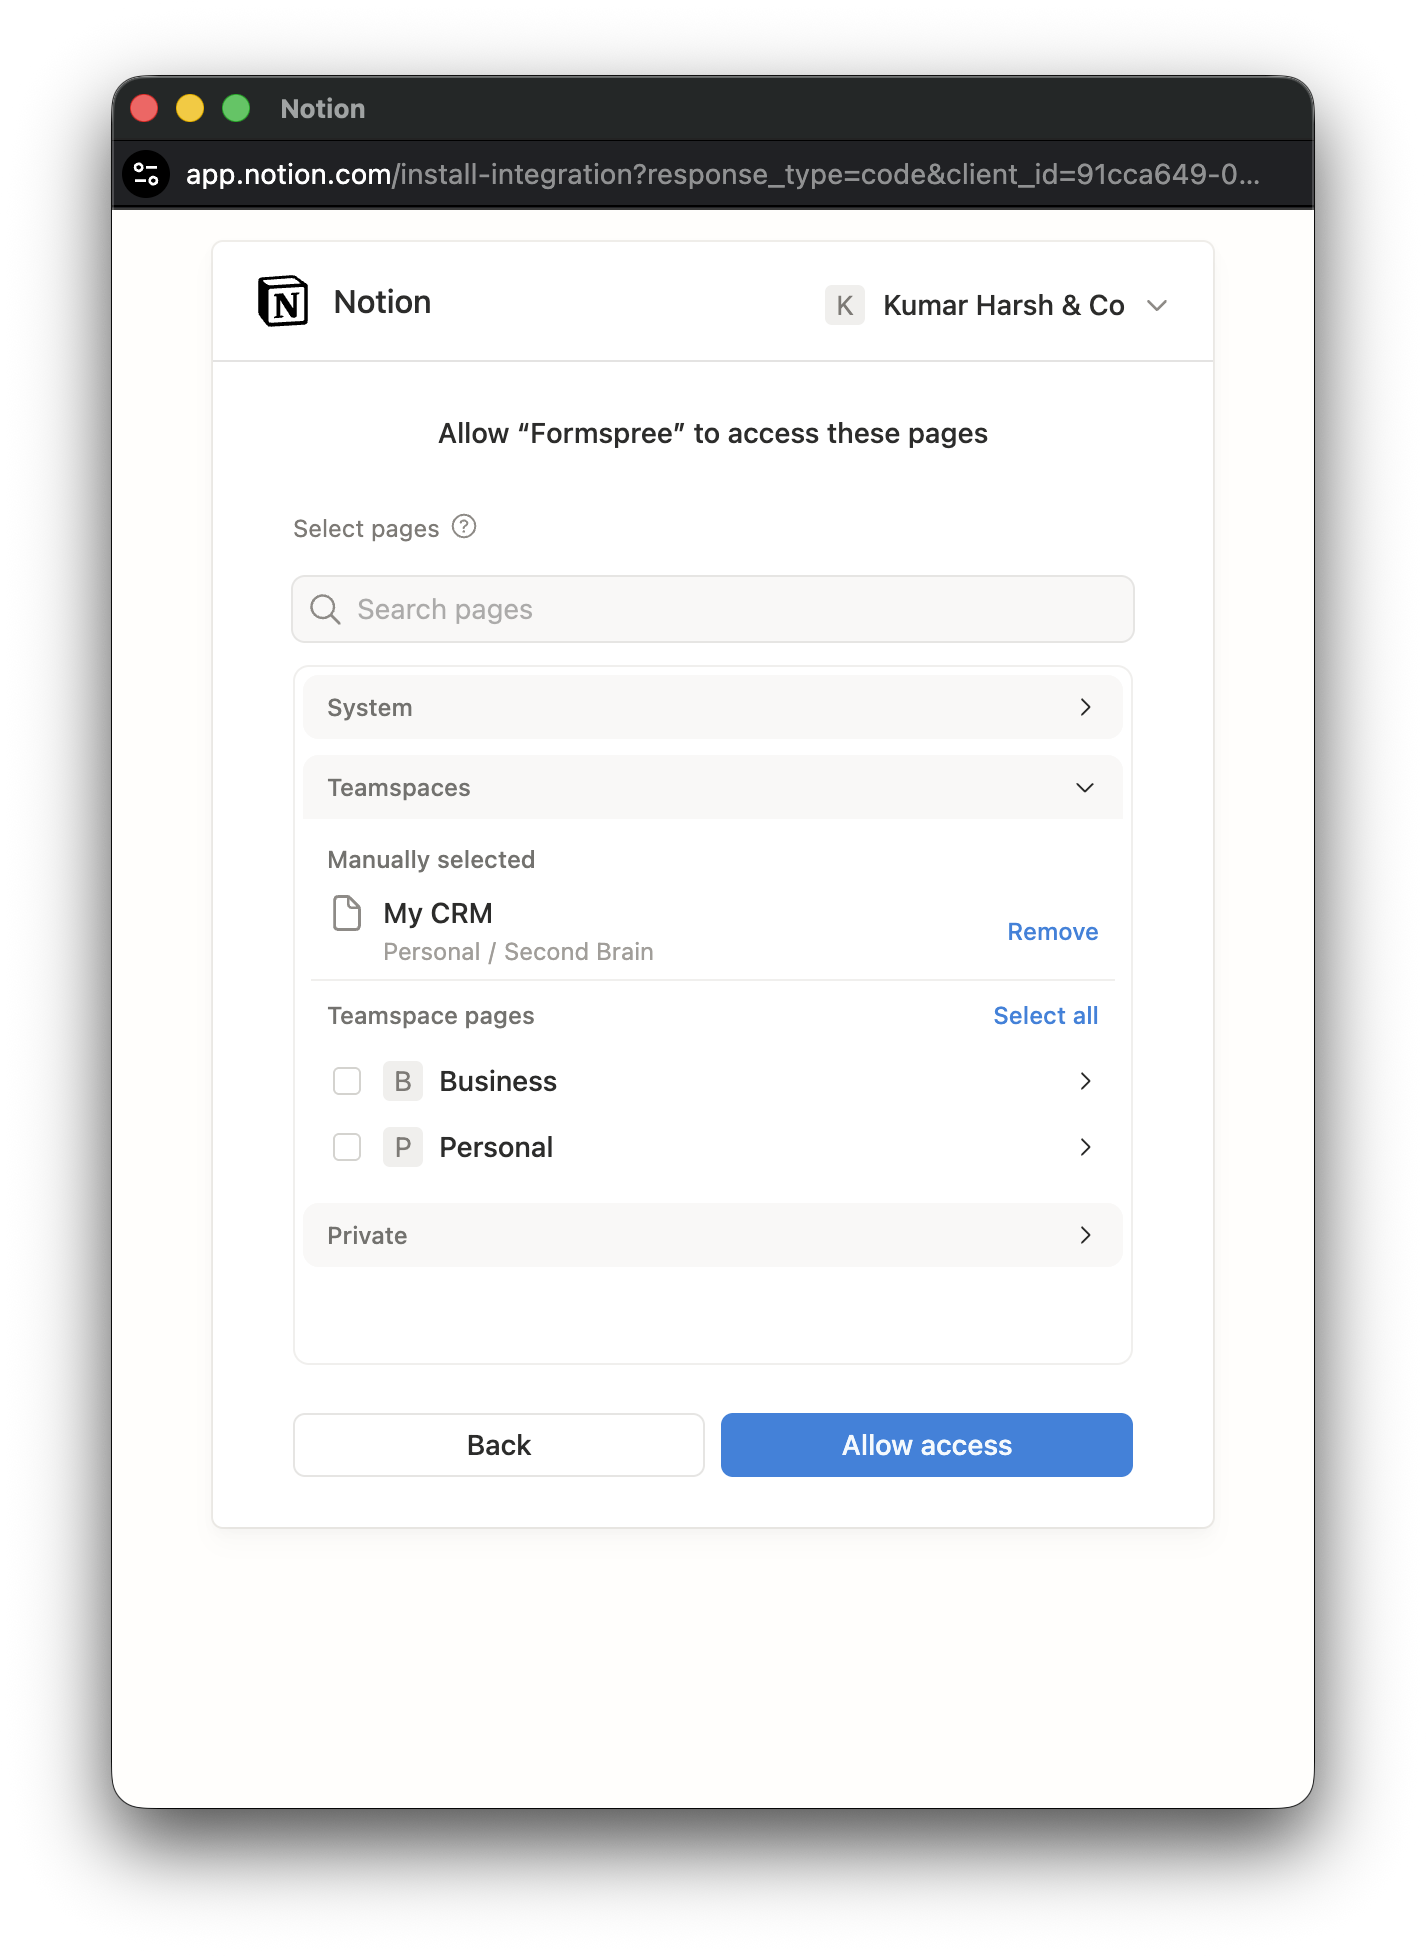
Click Allow access. After authorization, Formspree shows a dropdown of databases it can access. If you’ve only allowed access to one page, Formspree will automatically select it. It will then show a popup with a link to the new database it just created for your form:
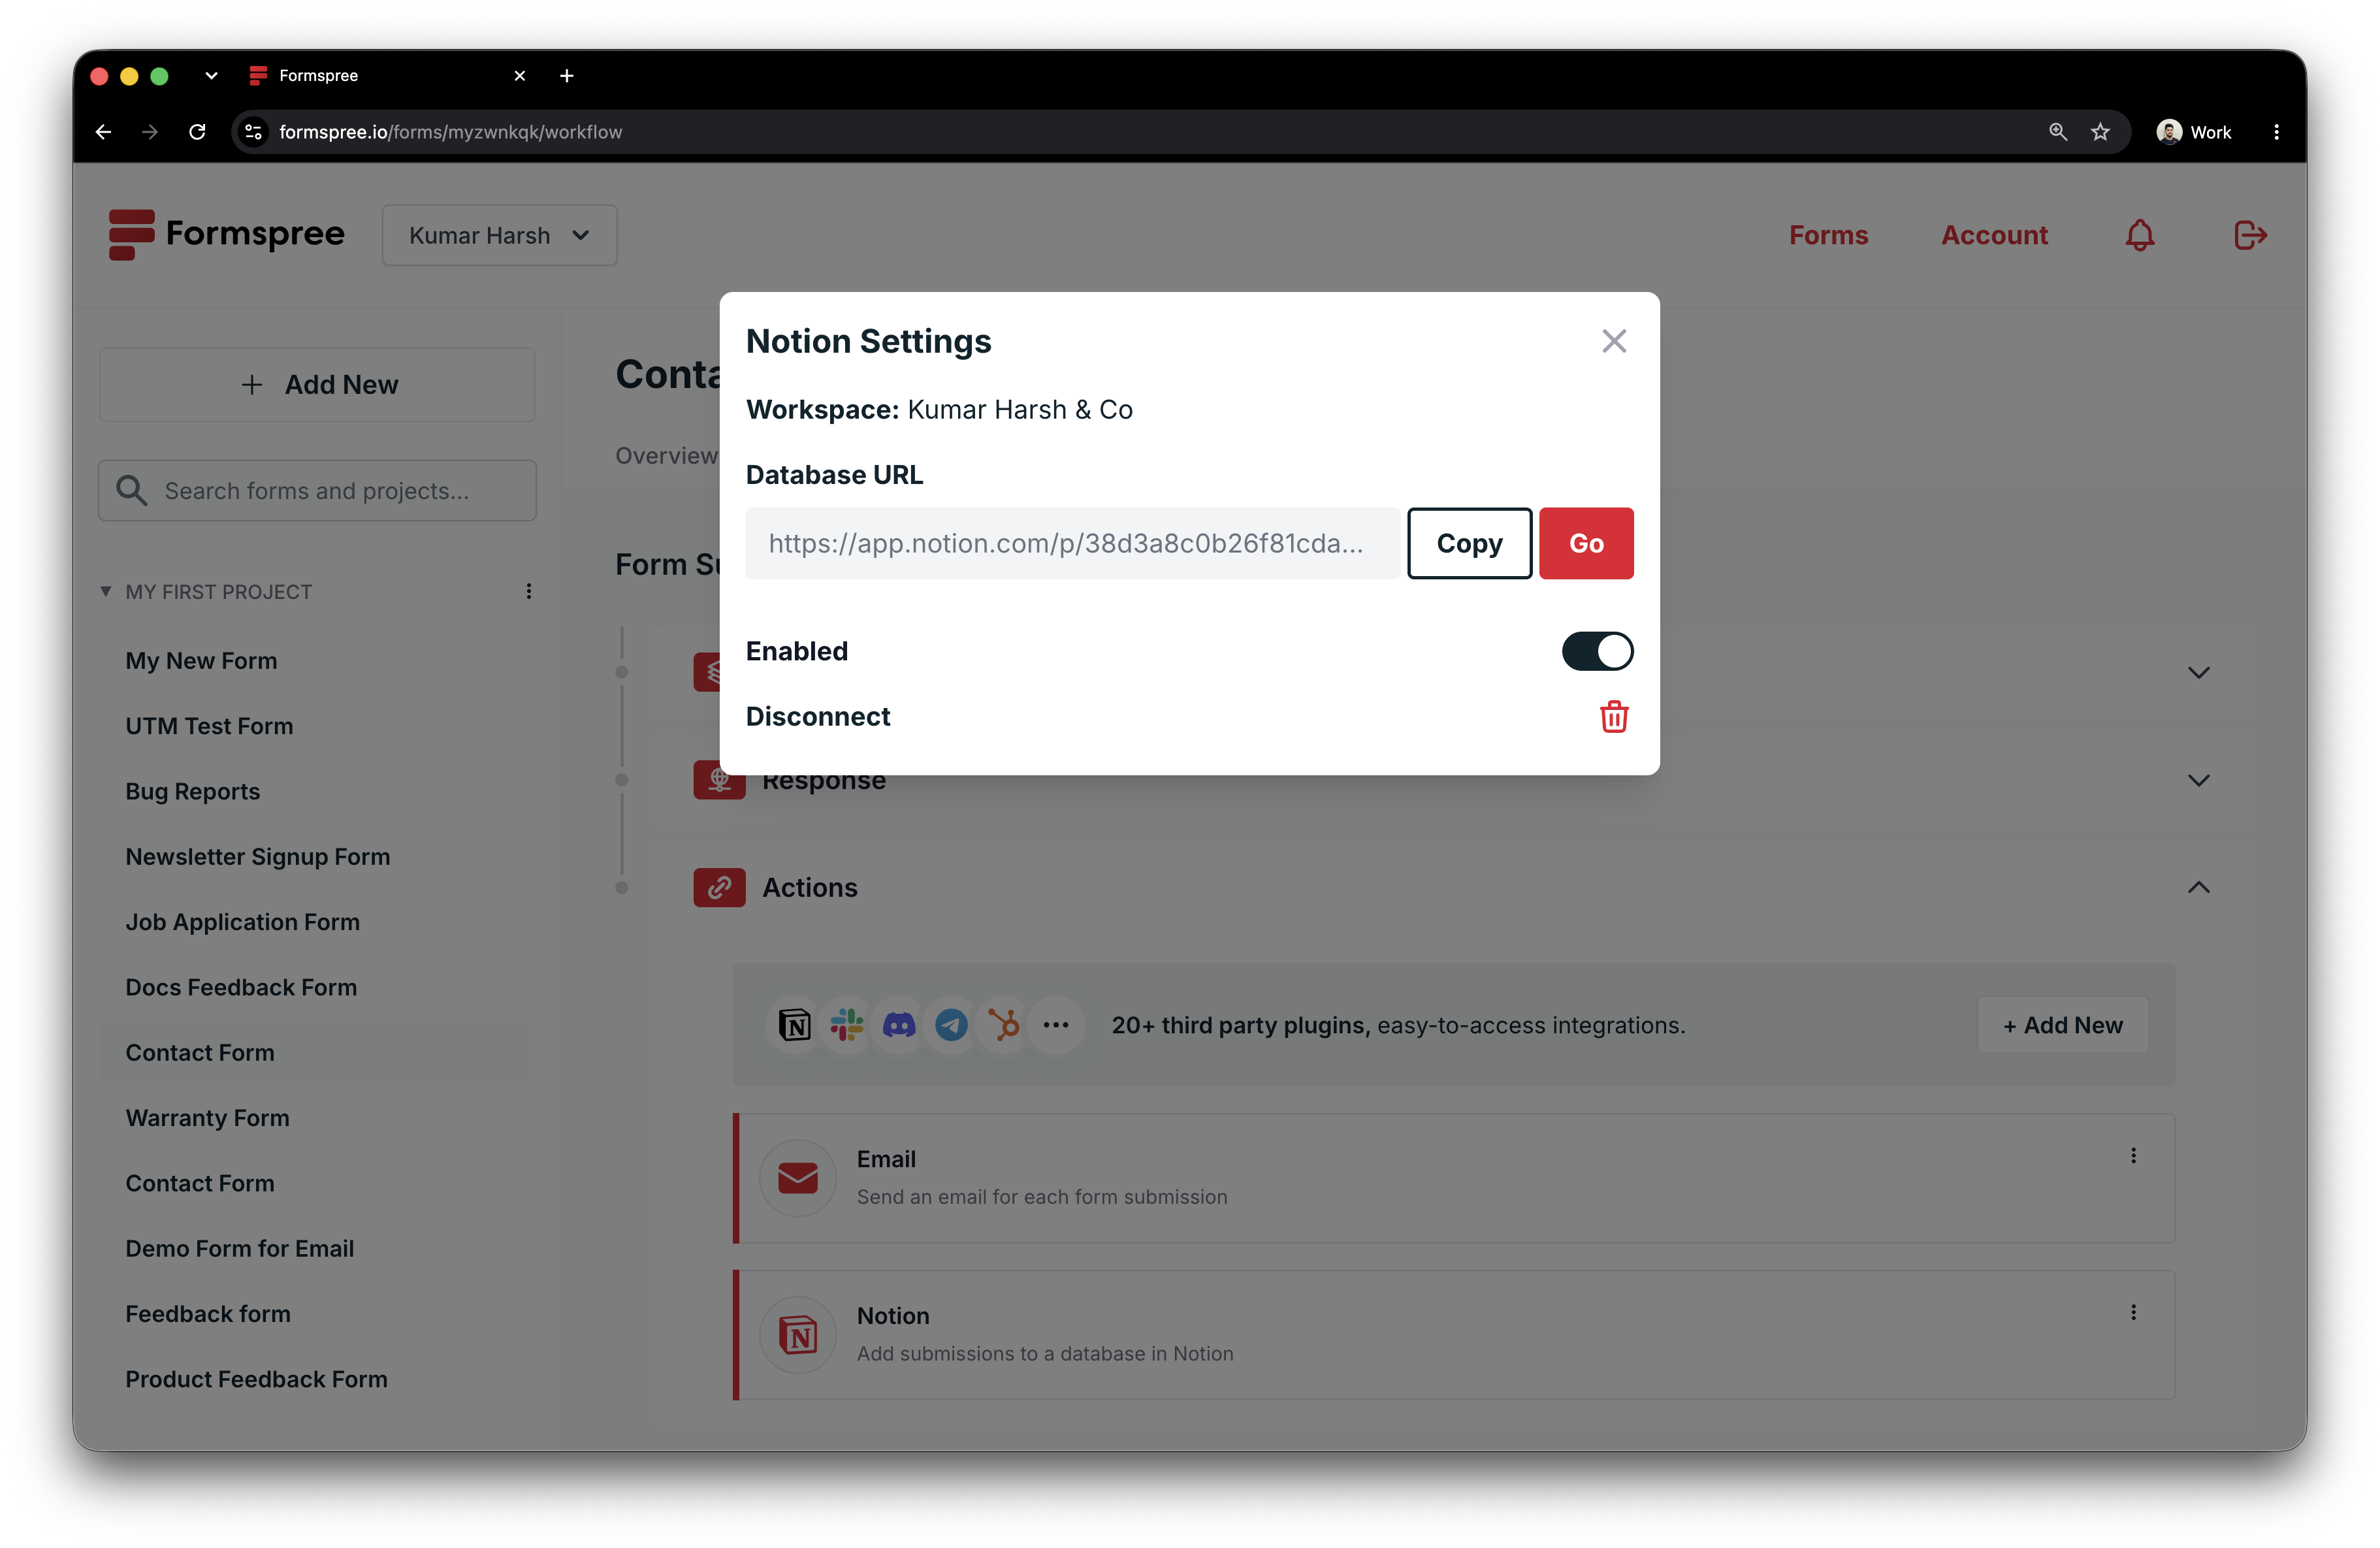
If you view the database right now, you’ll only see two default fields:
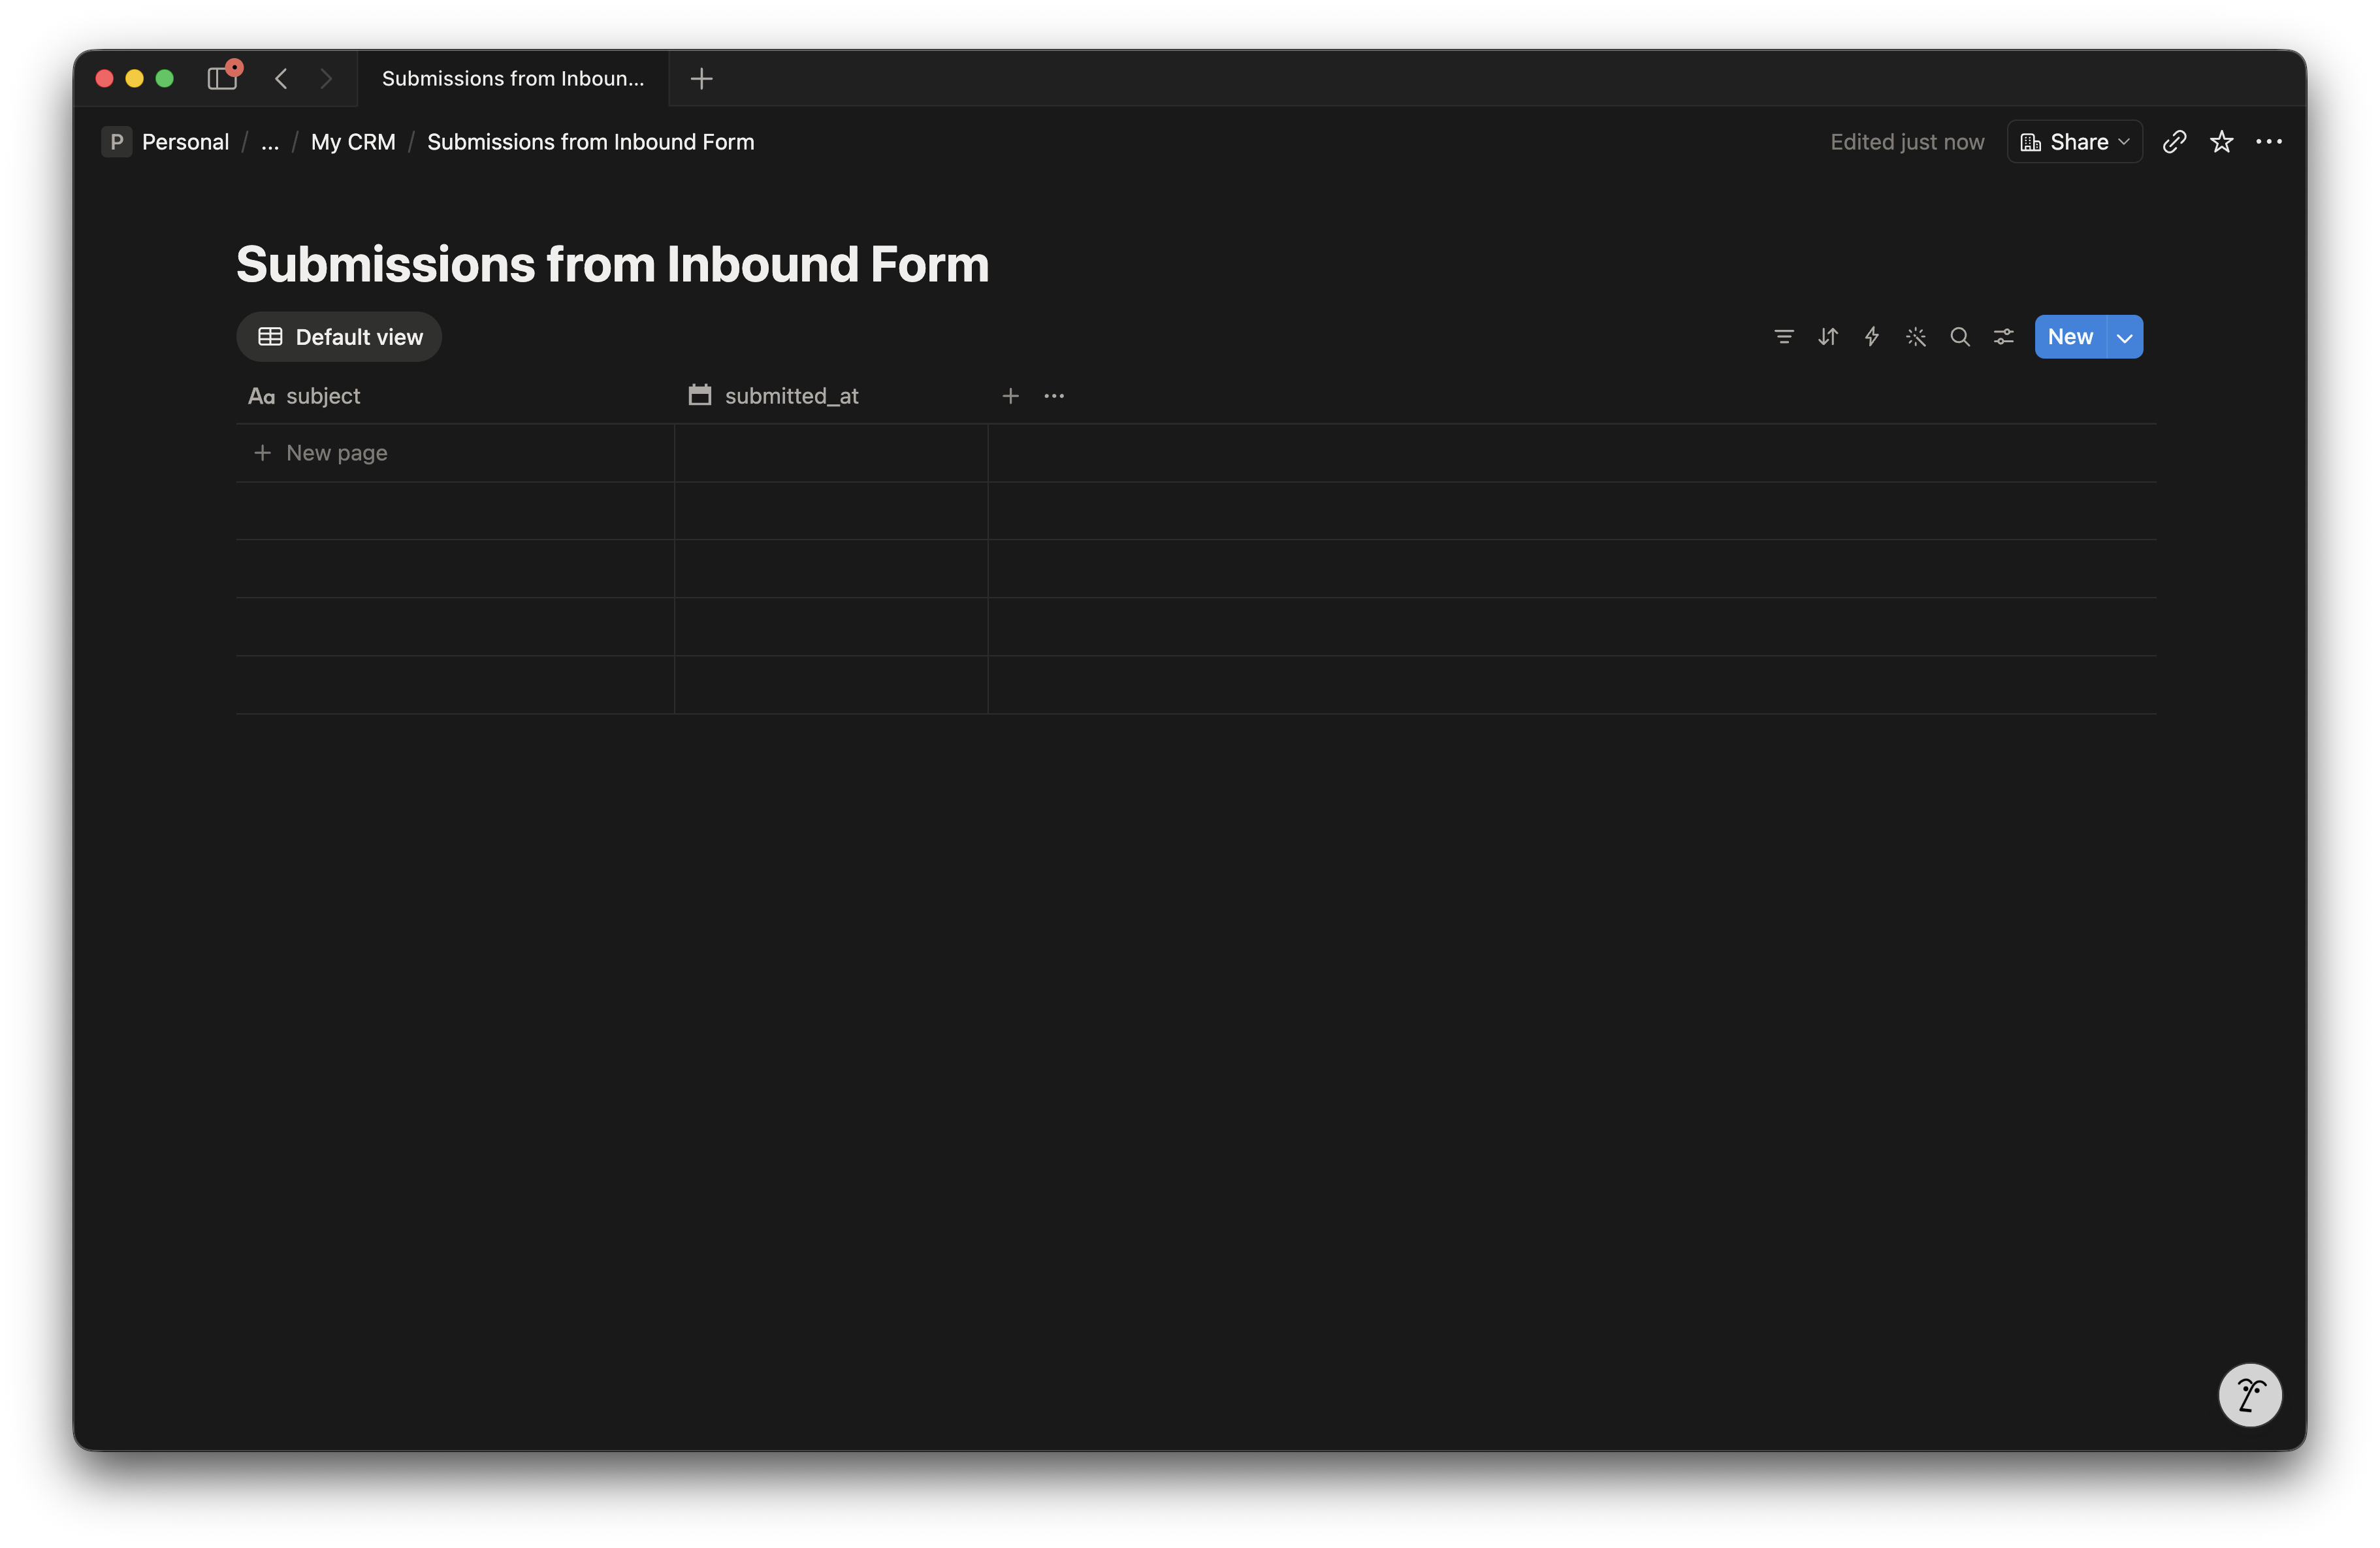
Formspree will add the necessary columns to the database as soon you receive your first form submission. Now, it is time to build your form.
Build the form
Here’s a minimal contact form for plain HTML:
  <form
    action="https://formspree.io/f/YOUR_FORM_ID"
    method="POST">
    <label>
      Name
      <input type="text" name="subject" required />
    </label>

    <label>
      Email
      <input type="email" name="email" required />
    </label>

    <label>
      Company
      <input type="text" name="company" />
    </label>

    <label>
      Message
      <textarea name="message" rows="5" required></textarea>
    </label>

    <!-- Honeypot: hidden from humans, discards naive bot submissions -->
    <input type="text" name="_gotcha" style="display:none" />

    <input type="hidden" name="source" value="contact-page" />

    <input type="hidden" name="status" value="new" />

    <button type="submit">Send</button>
  </form>
Make sure to replace YOUR_FORM_ID with the ID from your Formspree dashboard.
Here are a few things to pay attention to in this form:
- Setting the
nameattribute of the Name field assubjectmaps it to the Title property that notion auto-creates for each database. - The
_gotchahoneypot field is worth including on every form: Formspree checks it server-side and discards any submission where it’s been filled, which eliminates the category of unsophisticated bots that auto-fill every field they find. - The hidden
sourcefield populates the Source property in Notion automatically, with no visible input for the user. Same goes for thestatusfield.
For a React app, the @formspree/react package can handle the fetch request, manage loading and error state, and expose field-level validation errors from Formspree’s server-side checks:
npm install @formspree/react
  import { useForm, ValidationError } from '@formspree/react';

  export function ContactForm() {
    const [state, handleSubmit] = useForm('YOUR_FORM_ID');

    if (state.succeeded) {
      return <p>Thanks, we'll be in touch soon.</p>;
    }

    return (
      <form onSubmit={handleSubmit}>
        <label htmlFor="name">Name</label>
        <input id="name" type="text" name="subject" required />

        <label htmlFor="email">Email</label>
        <input id="email" type="email" name="email" required />
        <ValidationError field="email" prefix="Email" errors={state.errors} />

        <label htmlFor="company">Company</label>
        <input id="company" type="text" name="company" />

        <label htmlFor="message">Message</label>
        <textarea id="message" name="message" rows={5} required />
        <ValidationError field="message" prefix="Message" errors={state.errors} />

        <input type="hidden" name="source" value="contact-page" />
        <input type="hidden" name="status" value="new" />

        <button type="submit" disabled={state.submitting}>
          {state.submitting ? 'Sending...' : 'Send'}
        </button>
      </form>
    );
  }
The ValidationError component renders errors only when Formspree returns them, so the form stays clean on a first render and shows targeted feedback when something fails. The disabled state on the submit button during submission prevents duplicate rows in your Notion database from double-clicks.
What lands in Notion and how to use it
To test this out, submit a test submission from your form. Switch to your Notion database and you should see a new row with the values from the field Name as the row title, Email clickable, submitted_at populated with the submission timestamp, status set to “new”, and source set to “contact-page.”
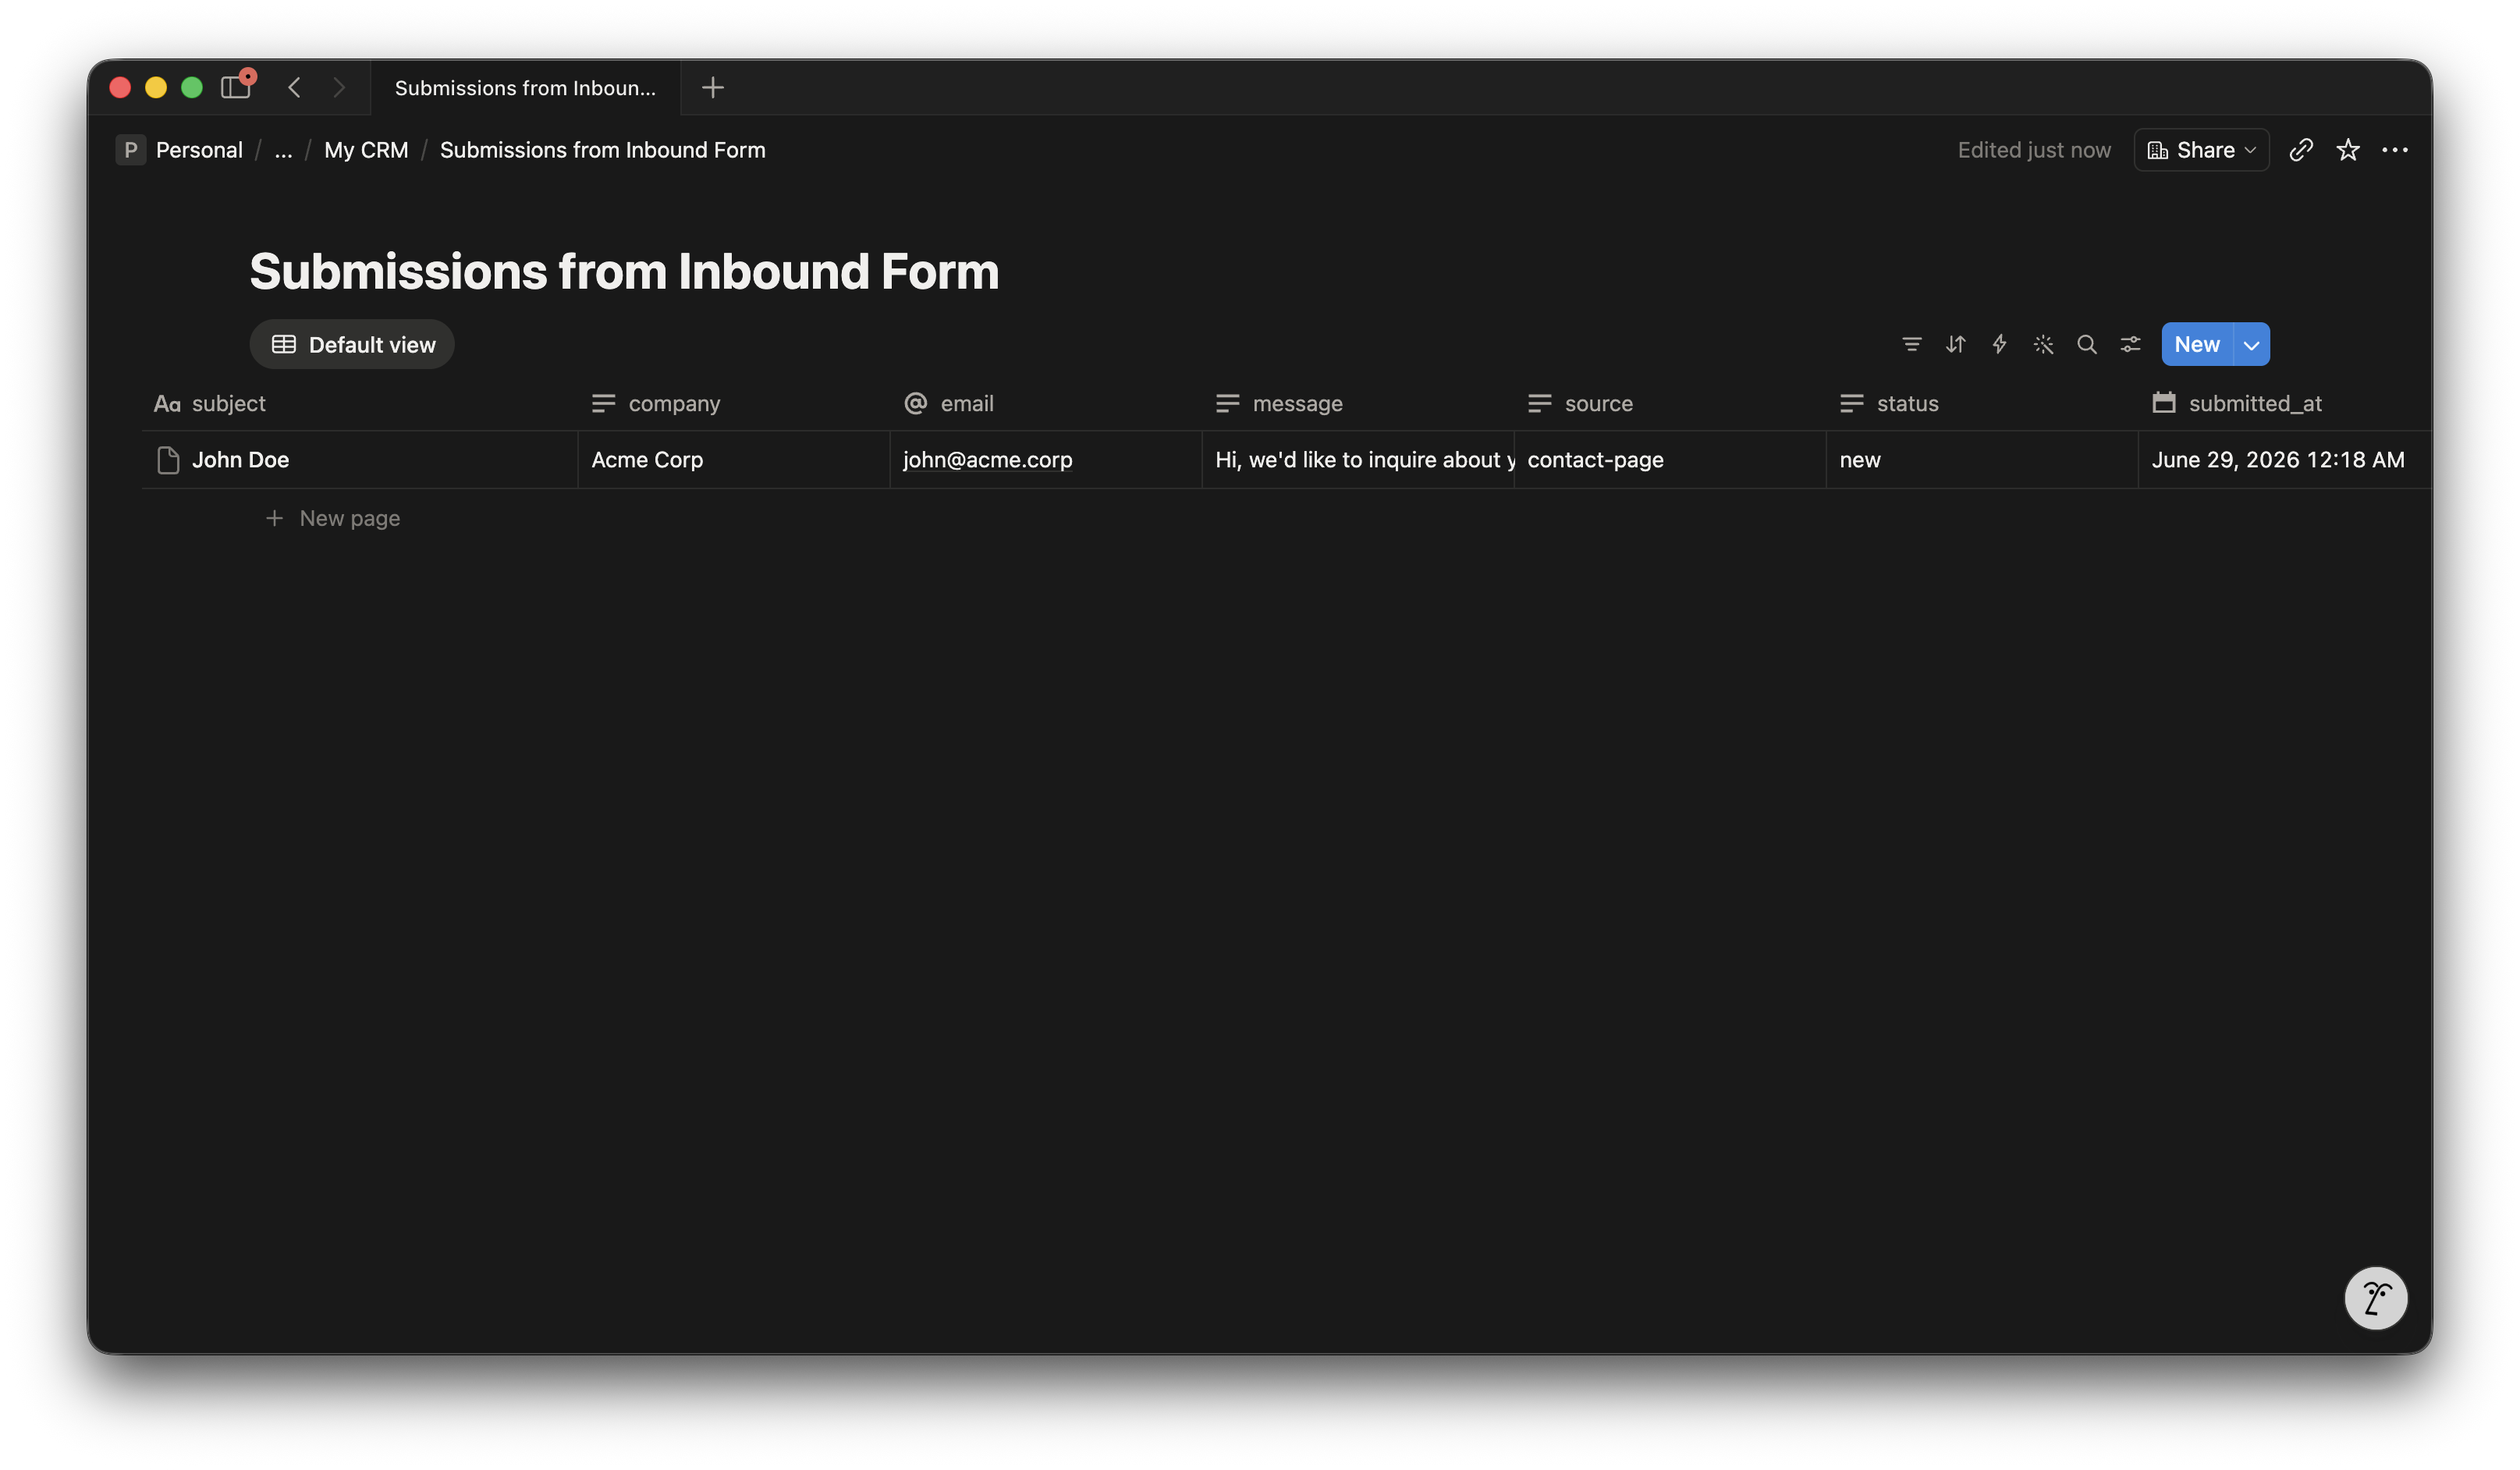
You’ll need to update the
sourceandstatusfields to select in your database schema to be able to filter using their values easily.
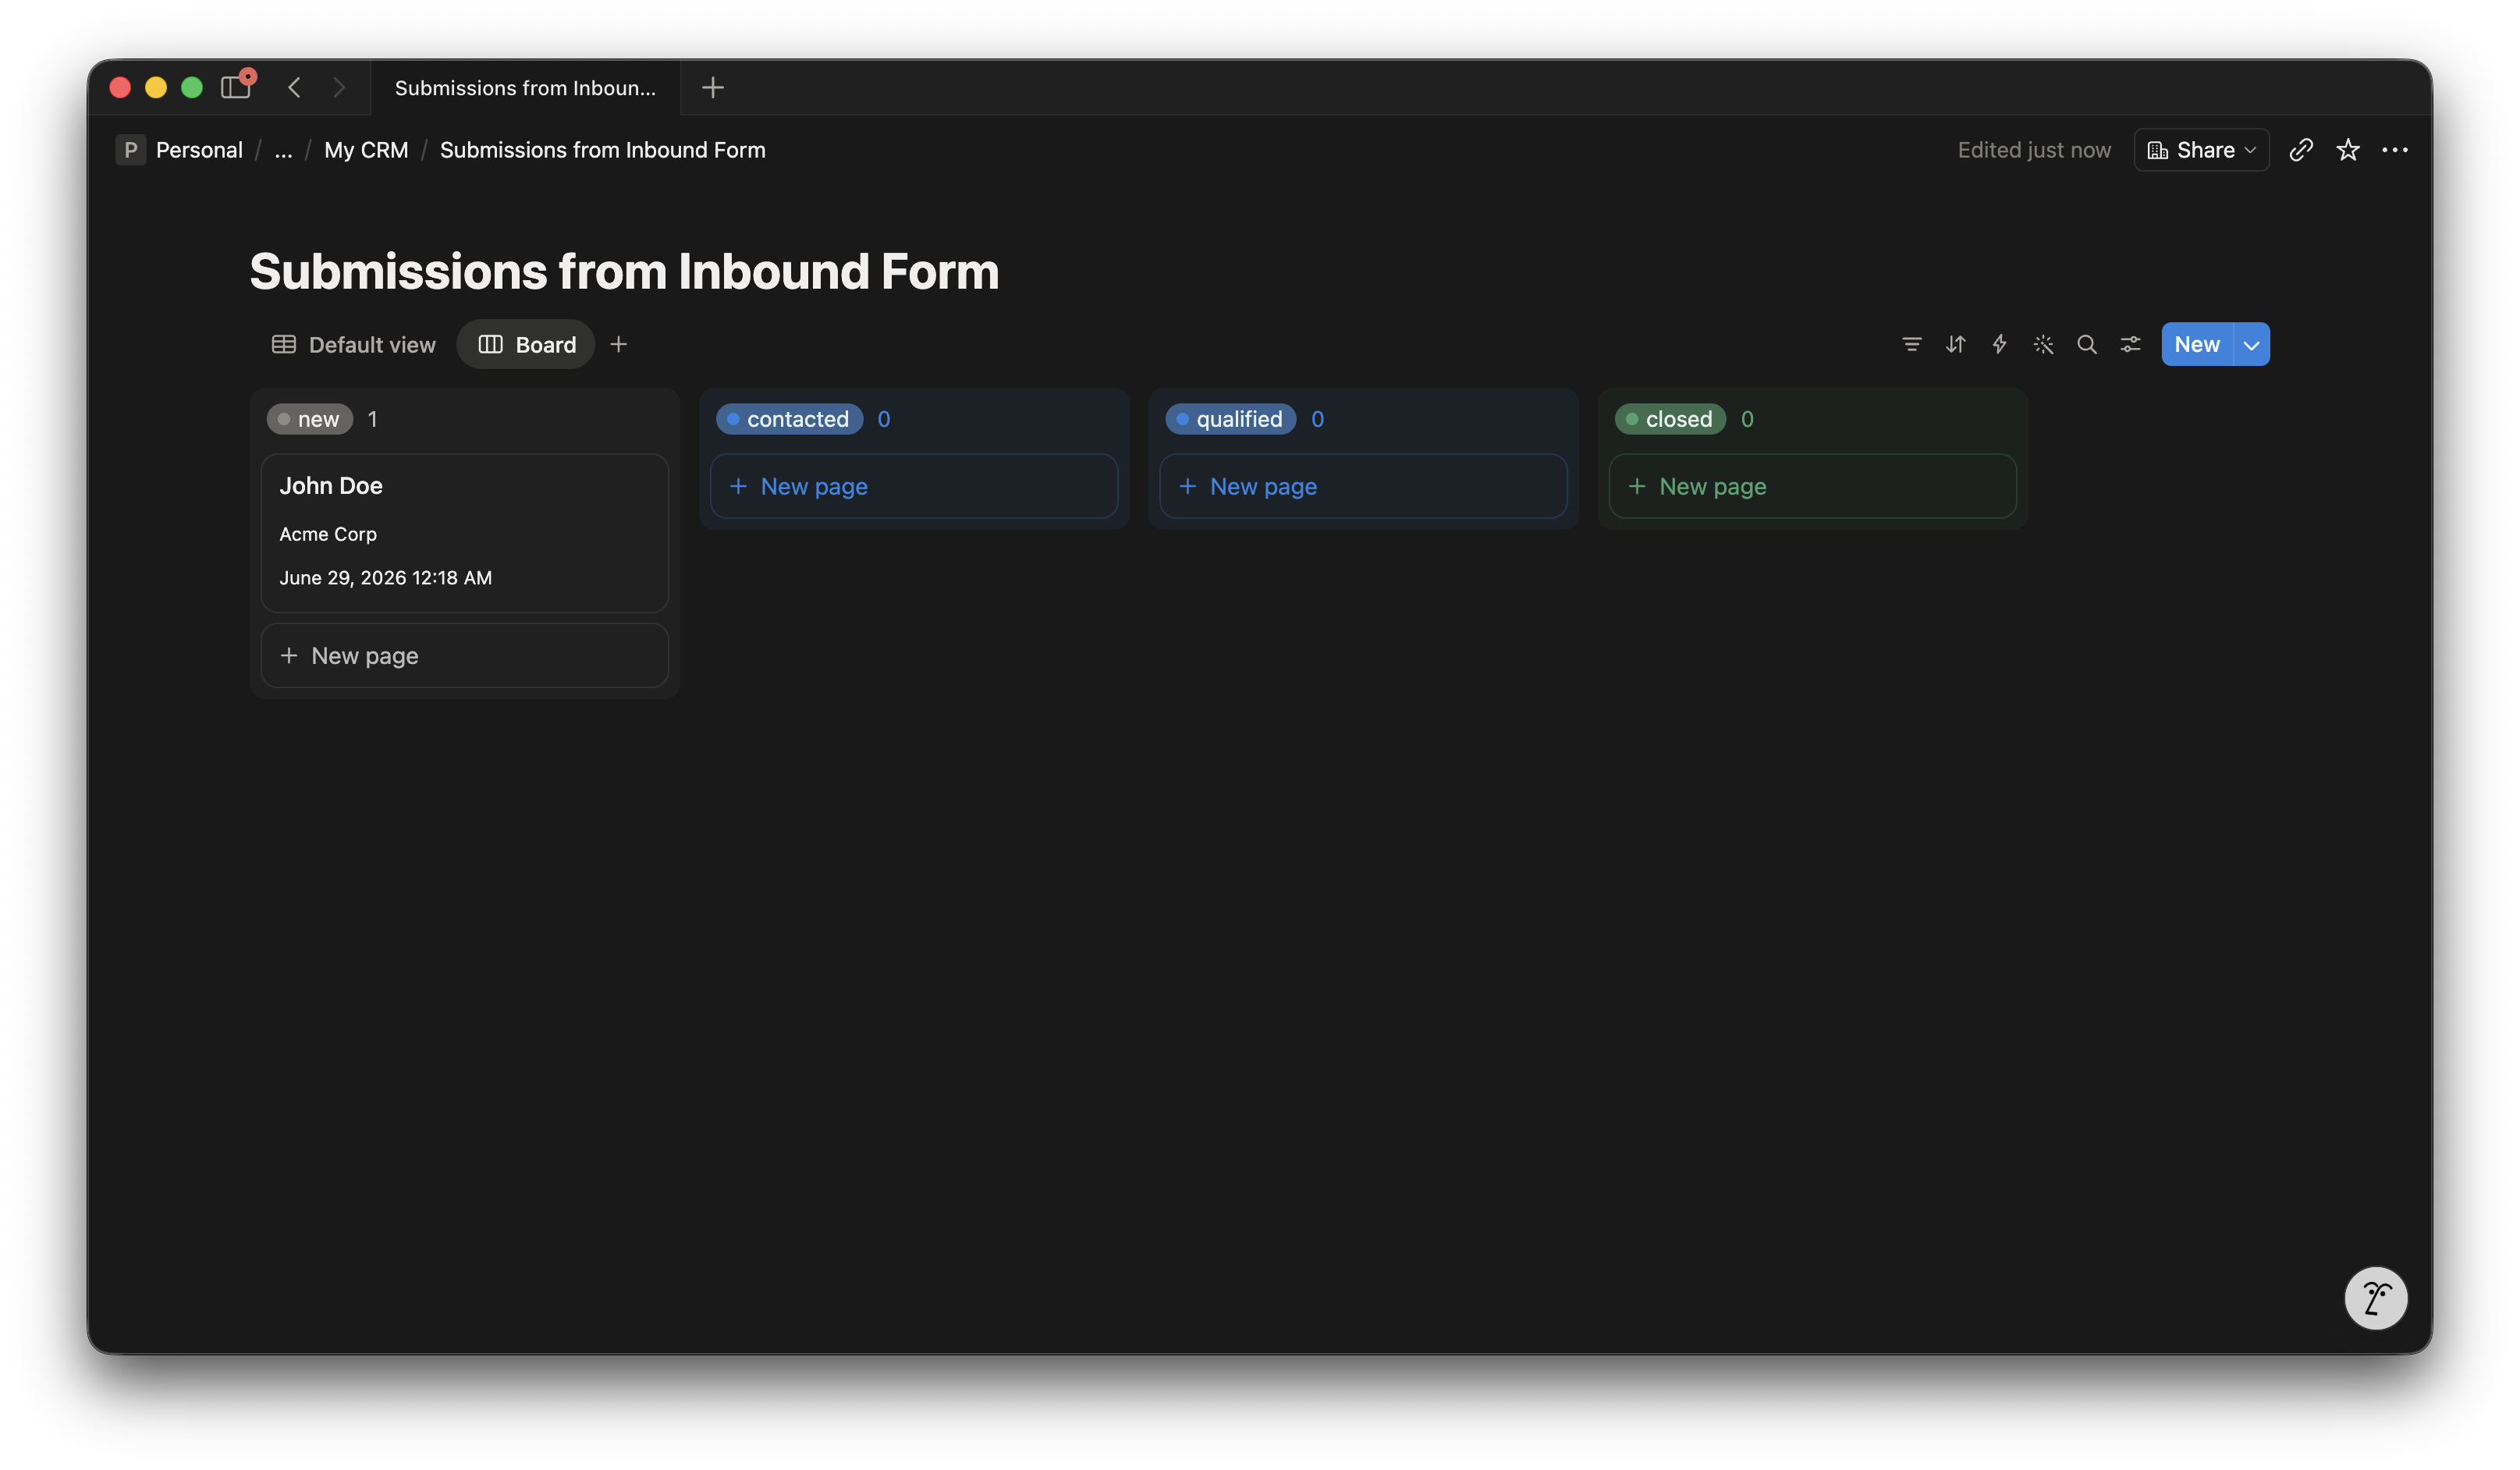
The database view is where this setup earns its advantage over plain email. A filtered view with Status = New gives you a live queue of unactioned submissions. A board view grouped by Status turns your database into a visual pipeline, allowing you to drag cards from New to Contacted to Qualified as you work through them.
Notion also lets you add formula properties that compute values from existing ones. A simple formula that counts how many days have passed since Submitted (dateBetween(now(), prop("Submitted"), "days")) gives you an “Age” column, so you can sort by contacts that have been sitting longest and know at a glance which ones need attention first.
Getting email notifications alongside Notion
Formspree writes to Notion on submission and sends you an email notification at the same time. The two are useful because the email gives you immediacy (you know the moment someone reaches out) while Notion gives you the structure to manage the follow-through.
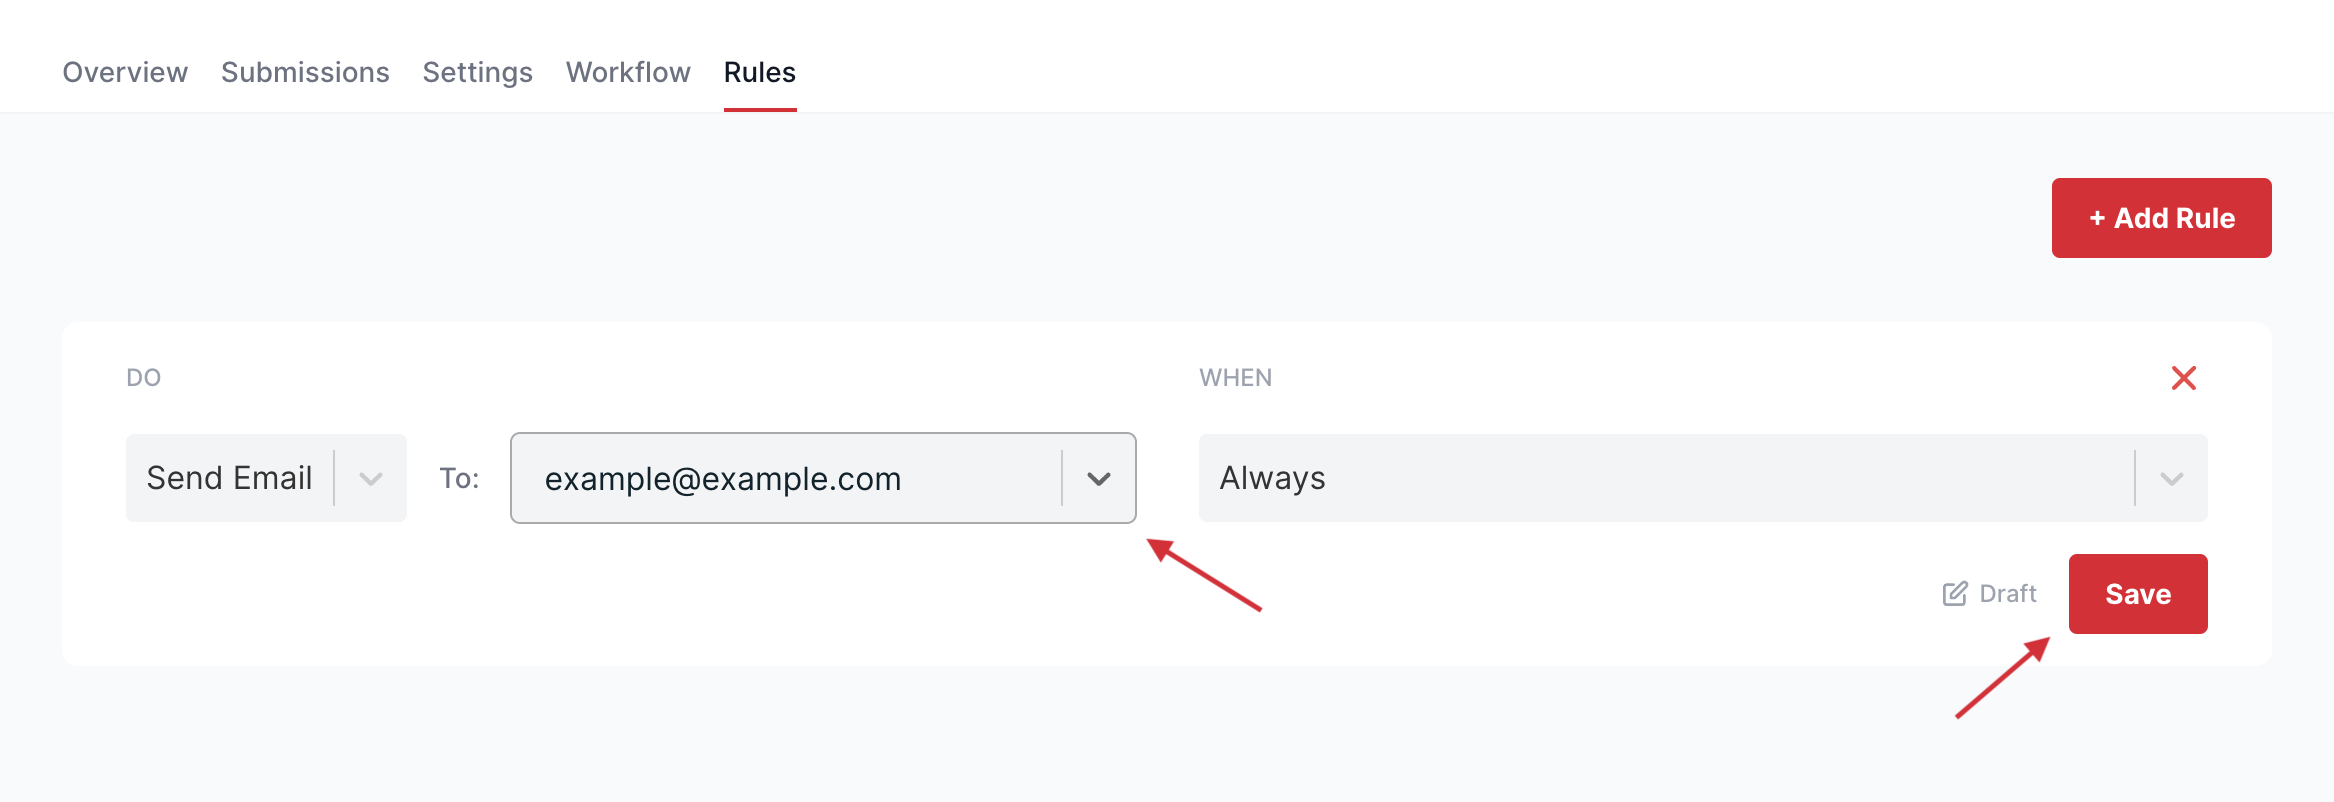
If you want to send email notifications to multiple email addresses upon submission, you can set this up using Form Rules. In your Formspree form settings, navigate to Rules. Click on the + Add Rule button and create a rule that always sends an email to the email of your choice:
Handling multiple forms in one database
If you add a second form (a quote request page, a partnership inquiry form, a newsletter with a “tell us about yourself” field), you can route all of them to the same Notion database by giving each form its own source value. Create a new form in Formspree for each use case, connect the same Notion database in the integration, and change the hidden source field value on each form:
  <!-- On your quote request page -->
  <input type="hidden" name="source" value="quote-request" />

  <!-- On your partnership page -->
  <input type="hidden" name="source" value="partnership" />
In Notion, filter by Source = quote-request and you see only those submissions. The same database holds all your inbound contacts, filterable by origin, with no duplication of properties or setup.
Handling file attachments
For forms where you want to collect files (a portfolio, a project brief, a spec document), add a file input and Formspree stores the upload and links it in the submission detail view:
  <label>
    Attach a brief (optional)
    <input type="file" name="brief" accept=".pdf,.doc,.docx" />
  </label>
The file itself won’t appear as a Notion attachment (Notion’s API doesn’t support external file uploads in that way), but the Formspree dashboard entry for the submission includes a download link. Keep the accept attribute specific to file types you actually need. A form that accepts all file types is an unnecessary exposure, and the attribute also gives submitters clearer guidance about what format to use.
Automating follow-up inside Notion
Once submissions are flowing into your database, Notion Automations (available on Plus plans and above) can trigger when a new page is created in your database. A few patterns that pair well with this setup:
- You can trigger a Slack notification to a team channel when a new row appears, which replicates the immediacy of email for teams who live in Slack.
- You can assign the row to a specific person automatically based on Source, so quote requests go to one team member and partnership inquiries go to another without anyone routing them manually.
- You can create a linked entry in a separate “Follow-up” tasks database with a due date set to two days after Submitted, so nothing slips without a tracked action item behind it.
None of that requires a third-party automation tool. Notion’s native automations handle the common cases, and the data is already in the right shape because the integration mapped it correctly on the way in.
Where this setup reaches its limits
This configuration works well through a few hundred contacts a month, after which Notion starts to feel like the wrong tool for contact management. Bulk actions, activity timelines per contact, and reporting across date ranges are places where Notion’s database becomes genuinely slower to work in compared to a purpose-built CRM.
The Formspree-to-Notion integration is also one-directional. Formspree writes to Notion on submission and stops there. If you need your CRM to feed data back into user-facing experiences (pre-filling form fields for returning contacts, for example, or triggering a Formspree confirmation email based on a Notion status change), you’d need a custom integration using both the Formspree API and the Notion API. That’s a reasonable next step for teams who outgrow the basic setup, but it’s also a sign that a dedicated CRM is probably the right call at that point.
And if your form attracts serious spam volume once it’s been indexed or shared publicly, the honeypot alone won’t be enough. Formspree’s Formshield ML filtering and custom spam rules handle the patterns that frontend techniques can’t catch, and those are worth enabling on any form that gets real traffic. The honeypot takes you from “a lot of spam” to “some spam,” and the backend filtering layer takes you from “some spam” to “noise you can ignore.”
If you’re just getting started, don’t let any of that stop you. The setup here gets you 80% of the way to a real CRM in ten minutes — and for most freelancers and small teams, that’s all you’ll ever need. When you do outgrow it, you’ll have clean, structured data already in Notion to export and migrate. That’s a better starting point than a cluttered inbox.