
React Forms with NextJS
In this guide we’ll show you how to add a contact form to your Next.js website using Formspree.
Formspree is a form backend that’s perfect for static and hybrid frameworks like Next.js. Whether your site uses static generation (SSG), server-side rendering (SSR), or edge functions, Formspree handles submissions without you having to manage backend infrastructure.
At the end of this guide you should have a working React contact form in your Next.js project that sends you email notifications. Check out a live demo of the final project. The project repository is hosted on GitHub.
Prerequisites
To follow this guide you’re going to need a Formspree account, which you can sign up for free right here, and an existing web project built with Next.js. If you don’t have a Next.js project yet, you can create one by running:
npx create-next-app <app-name>
If you’re not familiar with Next.js then check out the official documentation to learn more.
Adding a form to Next.js
Since Next.js uses React, the form code you’re about to add can be neatly wrapped up in a React component. We’re going to build a form component that you can place anywhere in your Next.js site. First create a new file called contact-form.js inside of your ./app/components directory. Here’s an example of the file structure including your new component:
project-root
├── app
│   ├── components
│   │   └── contact-form.js
│   ├── favicon.ico
│   ├── globals.css
│   ├── layout.js
│   └── page.js
Next we’ll build the form component using a helper library from Formspree, @formspree/react. This library contains a useForm hook to simplify the process of handling form submission events and managing form state. Install it with:
npm install --save @formspree/react
Then paste the following code snippet into the contact-form.js file:
"use client"
import { useForm, ValidationError } from "@formspree/react";

export default function ContactForm() {
  const [state, handleSubmit] = useForm("YOUR_FORM_ID");

  if (state.succeeded) {
    return <p>Thanks for your submission!</p>;
  }

  return (
    <form onSubmit={handleSubmit}>
      <label htmlFor="email">Email Address</label>
      <input id="email" type="email" name="email" />
      <ValidationError prefix="Email" field="email" errors={state.errors} />
      <textarea id="message" name="message" />
      <ValidationError prefix="Message" field="message" errors={state.errors} />
      <button type="submit" disabled={state.submitting}>
        Submit
      </button>
      <ValidationError errors={state.errors} />
    </form>
  );
}
A few notes:
- Currently the form contains a placeholder
YOUR_FORM_ID. We’ll replace this with our own form endpoint in a bit. - The
useFormhook returns astateobject and ahandleSubmitfunction which we pass to theonSubmitform attribute. Combined, these provide a way to submit the form data via AJAX and update form state depending on the response received. ValidationErrorcomponents are helpers that display error messages for field errors, or general form errors (if nofieldattribute is provided).- For the sake of clarity, this form doesn’t include any styling, but in the GitHub project you can see an example of how to apply styles to the form.
The component can now be imported in your Next.js pages like so:
import ContactForm from "./components/contact-form";
And inserted into the page as a React component:
<ContactForm />
For this tutorial, we’ll add the <ContactForm /> component to the bottom of our index.js file above the footer, but you can add it wherever you like!
Once you’ve saved your additions use your build or deployment workflow to either run the Next.js site locally or deploy it to your live environment to see the newly added form.
When you attempt to submit the form, you’ll currently see an error message:

Oops! We get an error because we still have the placeholder YOUR_FORM_ID in the form action. Let’s fix this by setting up a form endpoint to accept our form submissions.
Creating a form endpoint
Next we’ll create a form endpoint using Formspree. If you don’t have an account yet you can sign up.
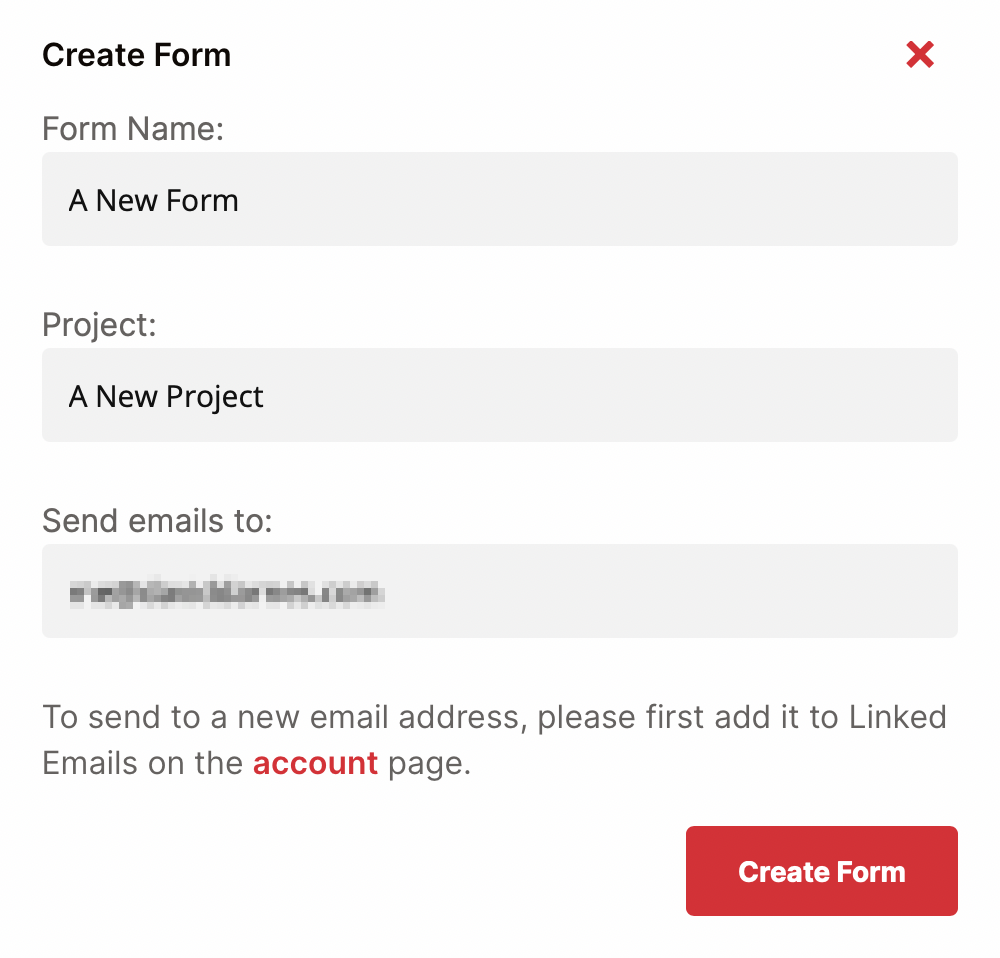
To start, create a new form with the +New form button, call it Contact form and update the recipient email to the email where you wish to receive your form submissions. Then click Create Form.
You’ll then be presented with the integration options for your new Formspree form. Note that Formspree provides you with a wide range of implementation examples such as React, Ajax and regular HTML.
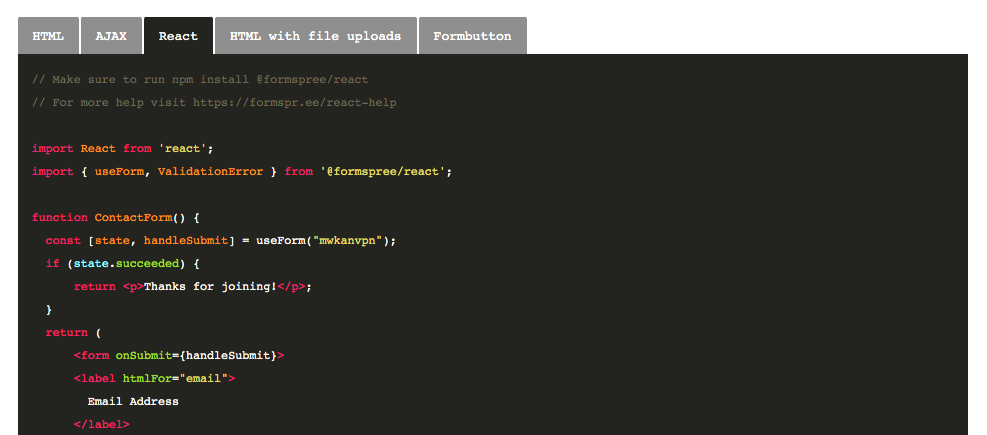
The code we used to create the contact-form.js component is almost identical to the React example on the integration page. We just need to update the form ID.
💡 If you are looking to set up a contact form or a request form, make sure to check out the ready-to-use templates in our Forms Library!
Copy the 8 character “hashid” from the new form’s endpoint URL and replace the YOUR_FORM_ID placeholder in your contact form component.
const [state, handleSubmit] = useForm("abcd1234"); // <-- your form ID
Now when you fill out the form and submit, you should see a success message.
Creating a form endpoint with Vercel
If you’re using Vercel, you can take advantage of the Formspree Vercel integration, which allows you to quickly create forms and automatically set up environment variables in your Vercel projects.
First go to the Formspree Vercel integration page. After clicking Add Integration you’ll be asked to log into Formspree, and then you’ll see a list of your Vercel projects that you can connect to Formspree.
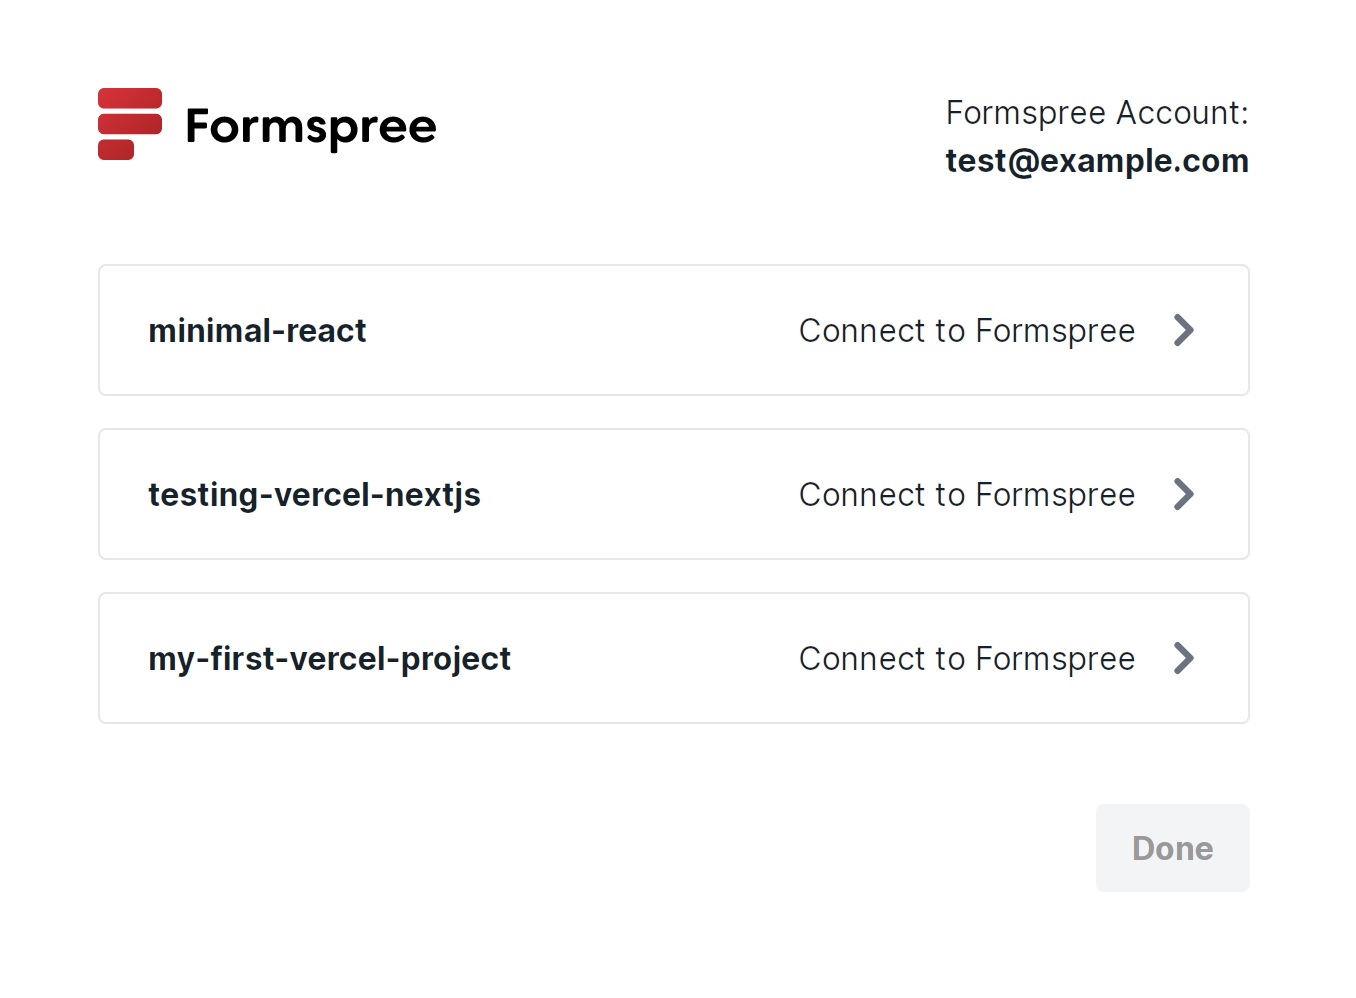
Connect the projects that you want to use with Formspree. You can create either dashboard or CLI projects (see more here) but, for the purposes of this tutorial, pick dashboard. Once you’ve finished connecting your projects, don’t forget to click Done to complete the integration setup.
By default the integration will create an initial form and store its ID in the NEXT_PUBLIC_FORM environment variable. To update your form code, open contact-form.js and replace the YOUR_FORM_ID placeholder with the environment variable like so:
const [state, handleSubmit] = useForm(process.env.NEXT_PUBLIC_FORM);
Now when you fill out the form and submit, you should see a success message.
That’s it, you’re done!
Bonus Tip: Using the Formspree CLI
The above example assumes you prefer creating and managing your forms using the Formspree dashboard. However if you prefer to use the Formspree CLI, you can do so with a few small changes. See our article on the Formspree CLI for more information.