Zod Validation in TypeScript
Build responsive, accessible forms in TypeScript and connect them to Formspree for effortless backend handling.

When working with TypeScript applications, ensuring your data is well-structured and correctly typed is essential. While TypeScript gives you static type safety during development, it doesn’t enforce those types at runtime. This means that the responsibility of validating the data that your app receives and handles in runtime is on you. That’s where schema validation libraries come in, helping you validate data inputs, API payloads, and more.
Among the many validation libraries available like Joi, Yup, and class-validator, Zod stands out for one reason: it’s built from the ground up for TypeScript. With Zod, you can define schemas and immediately infer TypeScript types from them. It offers a clean, fluent API and powerful features like schema composition, data transformation, and async validation, all while keeping your type definitions in sync with your validation logic.
In this article, you’ll learn how to use Zod to validate data in a TypeScript project, from defining basic schemas to handling complex, real-world form use cases. We’ll walk through setting up a simple app, building advanced schemas, and wrapping up with a fully dynamic form example that showcases Zod’s capabilities.
Whether you’re new to data validation or looking to replace an older solution with something more type-safe and ergonomic, this guide will help you master Zod and bring runtime reliability to your TypeScript code.
Getting Started with Zod
To get started, install Zod using your preferred package manager:
  npm install zod
  # or
  yarn add zod
Zod works seamlessly in any TypeScript project. For this tutorial, you can use a plain TypeScript environment or a TypeScript-based frontend framework like React. No extra configuration is needed: once Zod is installed, you’re ready to start defining schemas and validating data.
Defining Basic Schemas
At its core, Zod allows you to define schemas that describe the expected structure of your data. Here’s a basic example of how to define a schema for a user object:
  import { z } from 'zod';

  const UserSchema = z.object({
    name: z.string(),
    age: z.number().int().nonnegative(),
    email: z.email(),
  });
This schema defines three fields: name must be a string, age must be a non-negative integer, and email must be a valid email address.
Parsing and Validating Data
Once you’ve defined a schema, you can use it to validate data with .parse() or .safeParse():
  const result = UserSchema.safeParse({
    name: "Alice",
    age: 25,
    email: "alice@example.com",
  });

  if (!result.success) {
    console.error(result.error.format());
  } else {
    console.log("Valid user:", result.data);
  }
The .safeParse() method returns an object with a success flag and either the parsed data or a structured error object. This is particularly useful when you want to handle errors gracefully and show user-friendly messages in your application.
Type Inference with Zod
One of Zod’s most powerful features is automatic TypeScript type inference. You don’t need to duplicate type declarations, Zod will infer them directly from your schema:
type User = z.infer<typeof UserSchema>;
This User type will always match the schema, ensuring your runtime validation and compile-time types stay in sync. This eliminates a common source of bugs in TypeScript applications, where the runtime shape of data might not match your assumptions in code.
Building a Simple TypeScript App Using Zod
Now that you’re familiar with the basics of Zod, let’s build a simple TypeScript app that demonstrates its real-world usage. We’ll create a job application form with client-side validation using Zod and React. This section will walk you through setting up the project, defining schemas, validating input data, and displaying helpful error messages to the user.
Application Overview
Our sample app is a single-page form that allows users to submit a job application. The form collects essential details like the applicant’s name, email, phone number, skills, a brief description of their previous job, and their preferred start date. We’ll use Zod to ensure all fields are properly validated before submission and give users immediate feedback on any errors.
Setting Up the TypeScript Project
Start by initializing a new TypeScript + React project using Vite (or Create React App, if you prefer):
  npm create vite@latest job-app -- --template react-ts
  cd job-app
  npm install
Next, install the Zod library:
npm install zod
You’ll also want to include a minimal CSS framework or write your own styles for the form, but we’ll focus mostly on the logic here.
Implementing the Form with Zod Validation
Let’s begin by creating the form component. First, define a schema for the form fields using Zod:
  import { z } from 'zod';

  const JobApplicationSchema = z.object({
    name: z.string().min(2, "Name must be at least 2 characters long"),
    email: z.email("Invalid email address"),
    phone: z.string().optional(),
    skills: z.string().min(1, "Please list at least one skill"),
    lastJobDescription: z.string().min(10, "Please provide more detail"),
    preferredStartDate: z.string().refine((val) => !isNaN(Date.parse(val)), {
      message: "Please enter a valid date",
    }),
  });
This schema defines the structure and validation rules for the form using Zod. Each field is assigned a type and constraint. For example, name must be a string with a minimum of 2 characters, and email must match a valid email format. Optional fields, like phone, are marked using .optional(), and more complex validations (such as checking whether a string is a valid date) use .refine() with a custom function and error message.
In your React component, handle form input and validation:
  import React, { useState } from 'react';

  const JobForm = () => {
    const [formData, setFormData] = useState({
      name: '',
      email: '',
      phone: '',
      skills: '',
      lastJobDescription: '',
      preferredStartDate: '',
    });

    const [errors, setErrors] = useState<{ [key: string]: string }>({});

    const handleChange = (e: React.ChangeEvent<HTMLInputElement | HTMLTextAreaElement>) => {
      const { name, value } = e.target;
      setFormData(prev => ({ ...prev, [name]: value }));
    };

    const handleSubmit = (e: React.FormEvent) => {
      e.preventDefault();
      const result = JobApplicationSchema.safeParse(formData);

      if (!result.success) {
        const fieldErrors: { [key: string]: string } = {};

        const errorTree = z.treeifyError(result.error);

        if (errorTree.properties) {
          for (const [key, value] of Object.entries(errorTree.properties)) {
              if (value?.errors && Array.isArray(value.errors)) {
                  fieldErrors[key] = value.errors.join(', ');
              }
          }
      }
        setErrors(fieldErrors);
      } else {
        console.log("Form submitted successfully", result.data);
        setErrors({});
      }
    };

    return (
      <form onSubmit={handleSubmit}>
        <label htmlFor="name">Name</label>
        <input name="name" value={formData.name} onChange={handleChange} placeholder="Full Name" />
        {errors.name && <p>{errors.name}</p>}

        <label htmlFor="email">Email</label>
        <input name="email" value={formData.email} onChange={handleChange} placeholder="Email Address" />
        {errors.email && <p>{errors.email}</p>}

        <label htmlFor="phone">Phone (optional)</label>
        <input name="phone" value={formData.phone} onChange={handleChange} placeholder="Phone Number (optional)" />
        {errors.phone && <p>{errors.phone}</p>}

        <label htmlFor="skills">Skills</label>
        <textarea name="skills" value={formData.skills} onChange={handleChange} placeholder="Skills" />
        {errors.skills && <p>{errors.skills}</p>}

        <label htmlFor="lastJobDescription">Last Job Description</label>
        <textarea name="lastJobDescription" value={formData.lastJobDescription} onChange={handleChange} placeholder="Describe your last job" />
        {errors.lastJobDescription && <p>{errors.lastJobDescription}</p>}

        <label htmlFor="preferredStartDate">Preferred Start Date</label>
        <input name="preferredStartDate" value={formData.preferredStartDate} onChange={handleChange} placeholder="Preferred Start Date (YYYY-MM-DD)" />
        {errors.preferredStartDate && <p>{errors.preferredStartDate}</p>}

        <button type="submit">Submit</button>
      </form>
    );
  };

  export default JobForm;
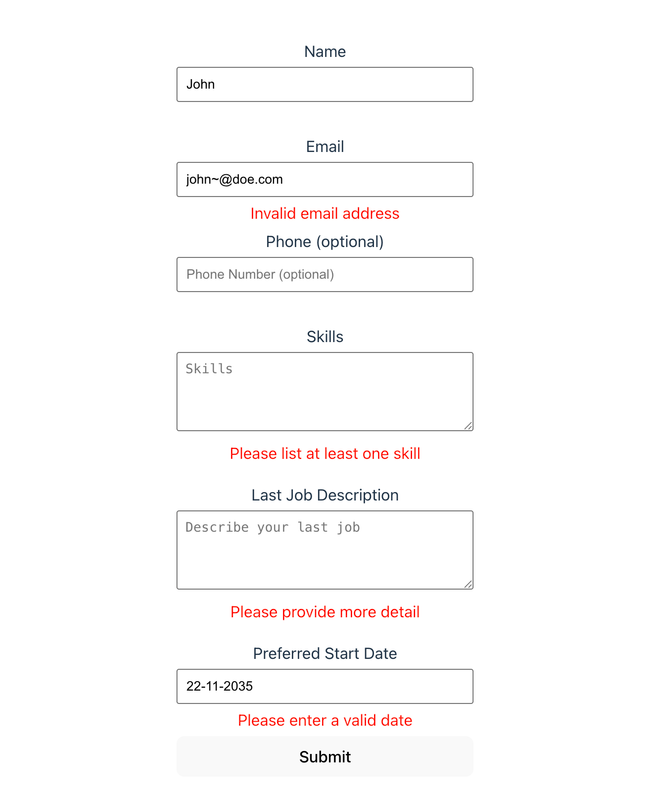
Here, the Zod schema is used during form submission with JobApplicationSchema.safeParse(formData), which safely parses and validates the form data. If validation fails, result.success is false, and we extract the error messages using z.treeifyError() to map each field to its corresponding message. These messages are then stored in state and displayed next to the fields. If validation succeeds, the form data is logged and the error state is cleared.
In the JSX, the errors object, which is populated by Zod validation, is used to conditionally show messages when a field is invalid. The form structure is fully decoupled from the validation logic, thanks to Zod’s schema-based approach, making the code cleaner and easier to maintain.
Here’s how the validation errors should pop up as soon as you hit the submit button:
Hooking Zod Up To Formspree!
Once you’ve set up zod in your app, connecting it to a real backend is just a few lines of code away.
Install Formspree’s React library by running the following command:
npm install @formspree/react
Then, update your form component to call Formspree’s useForm hook after Zod validation succeeds to submit the form input:
|
|
In this code, you:
- import
useFormandValidationErrorfrom Formspree’s React library. - Update the
onSubmitevent handler to submit the form using Formspree’shandleSubmitmethod after successful validation. - Show a success message upon successful submission.
- Use
ValidationErrorelements to show server side validation errors from Formspree - And, set up the submit button to show a loading state while Formspree is handling the submission.
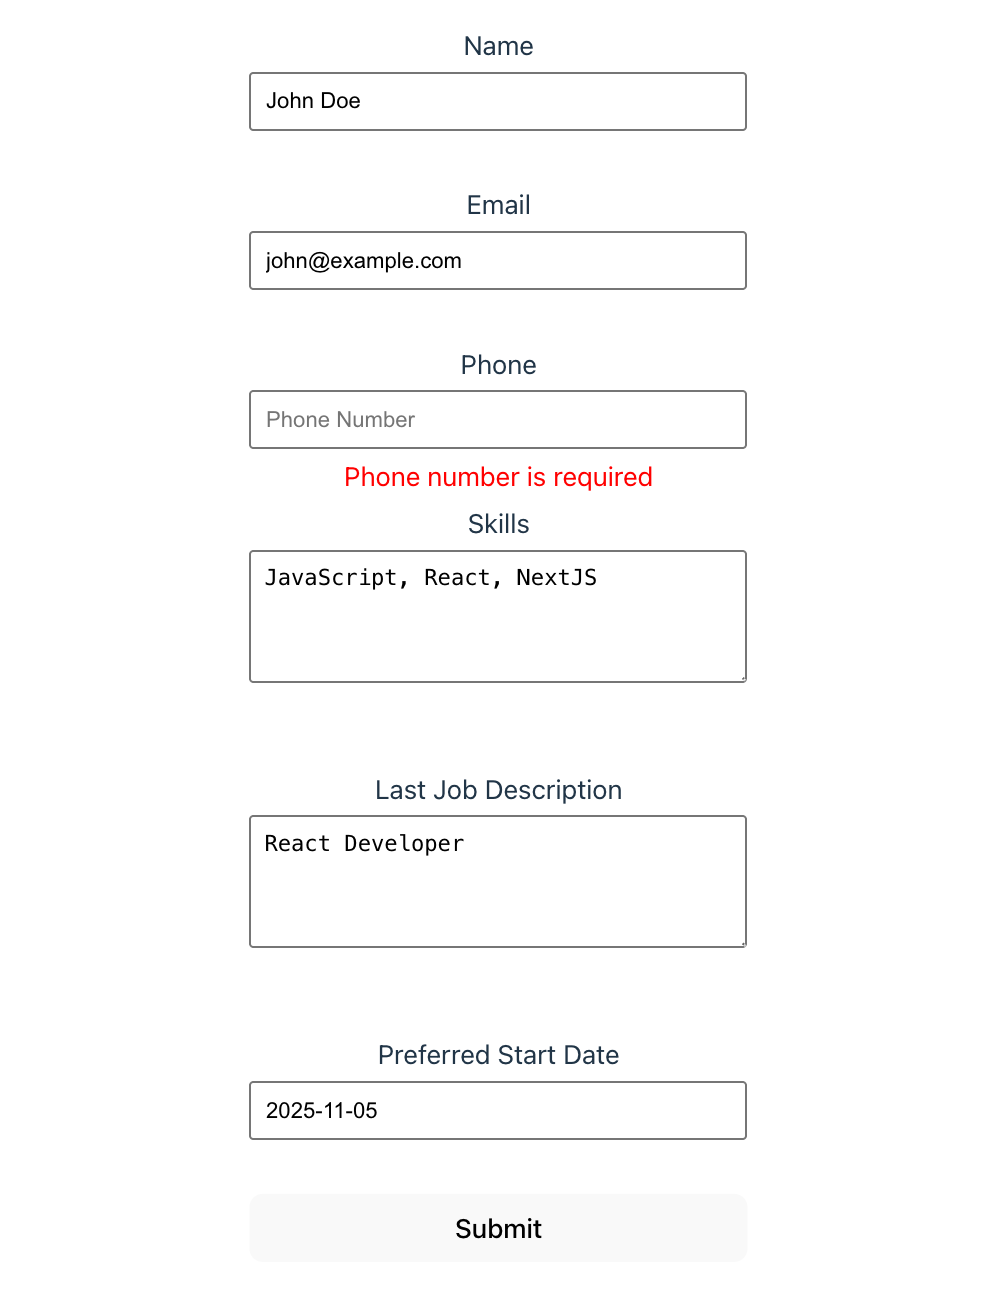
Here’s what a backend validation error sent from Formspree will look like:
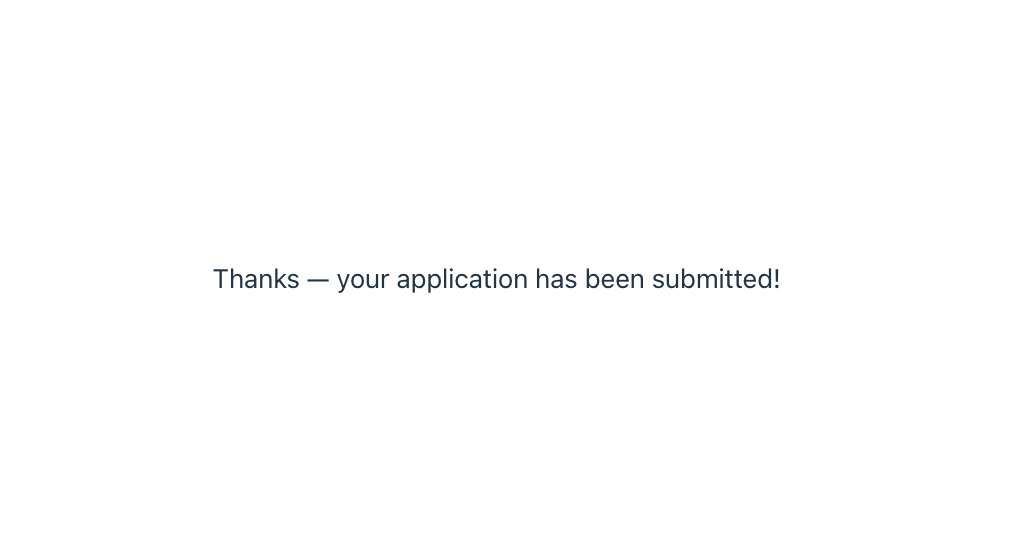
And here’s what a successful submission looks like:
Here’s a glimpse of your data collect in Formspree:
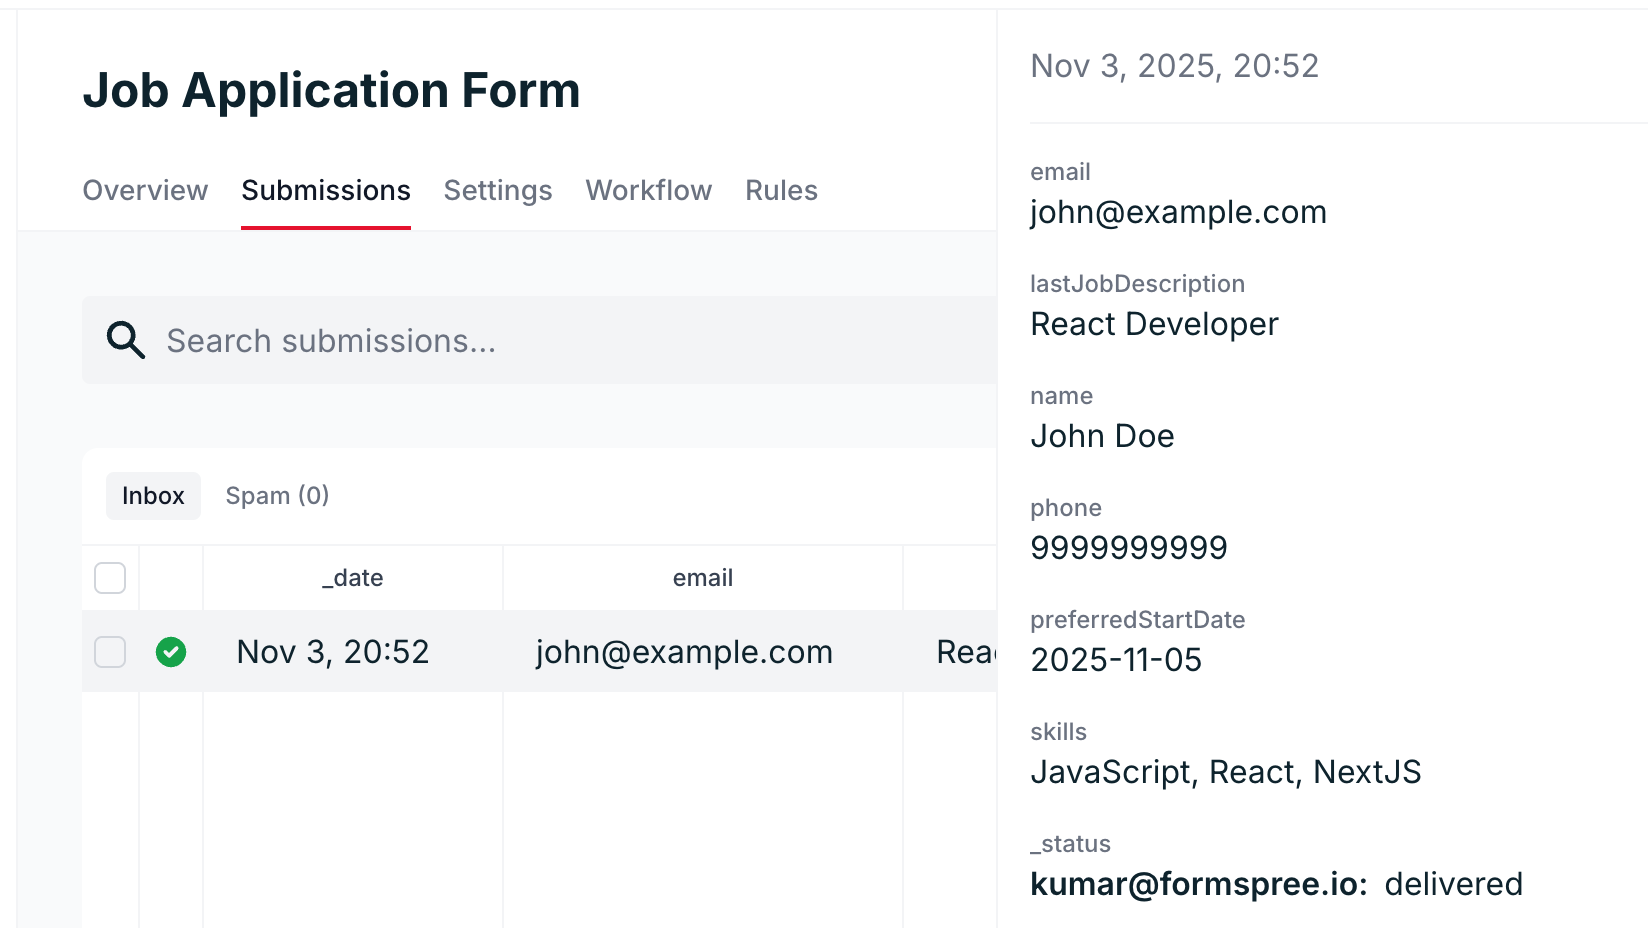
Now, client-side validation (via Zod) and backend handling (via Formspree) work hand-in-hand. Zod catches user input issues instantly in the browser. Formspree securely receives the validated payload and manages delivery and spam filtering.
You can stop here for simple use cases, or extend the setup to add file uploads, reCAPTCHA, or email autoresponders later on.
Advanced Zod Features and Use Cases
As your application grows, so will the complexity of your data. Zod makes it easy to manage complex forms and validations by providing advanced features such as schema composition, refinements, asynchronous validation, and data transformation.
Composing Complex Schemas
Zod allows you to break down your schemas into smaller, reusable pieces using methods like .merge() and .extend(). This is especially helpful when dealing with large forms or shared data structures.
  const BaseUserSchema = z.object({
    name: z.string(),
    email: z.email(),
  });

  const JobDetailsSchema = z.object({
    lastJobDescription: z.string(),
    skills: z.string(),
  });

  const FullApplicationSchema = BaseUserSchema.merge(JobDetailsSchema);
You can also use .extend() if you want to build on top of an existing schema without merging two completely different ones:
  const ExtendedSchema = BaseUserSchema.extend({
    preferredStartDate: z.string(),
  });
This modular approach encourages reuse and makes your codebase easier to maintain.
Using Refinements and Custom Validations
Sometimes basic validations aren’t enough; for example, when you need to check that a string contains specific content or a number falls within a business-specific range. Zod provides .refine() and .superRefine() to support custom validation logic.
  const DateSchema = z
    .string()
    .refine((val) => {
      const date = new Date(val);
      return !isNaN(date.getTime());
    }, {
      message: "Invalid date format",
    })
    .refine((val) => {
      const date = new Date(val);
      const now = new Date();
      return date >= now;
    }, {
      message: "Date cannot be in the past",
    });
You already saw how to use .refine() in the TypeScript example earlier. For more complex validation involving multiple fields or advanced error handling, .superRefine() gives you access to the entire object and allows you to add multiple issues:
  const EventSchema = z.object({
    startDate: z.string(),
    endDate: z.string(),
  }).superRefine((data, ctx) => {
    const start = new Date(data.startDate);
    const end = new Date(data.endDate);

    if (isNaN(start.getTime()) || isNaN(end.getTime())) {
      ctx.addIssue({
        code: z.ZodIssueCode.custom,
        message: "Both start and end dates must be valid dates",
        path: ["startDate"],
      });
      return;
    }

    if (end < start) {
      ctx.addIssue({
        code: z.ZodIssueCode.custom,
        message: "End date cannot be earlier than start date",
        path: ["endDate"],
      });
    }
  });
Asynchronous Validation with Zod
Need to validate against external data, like checking if a username is already taken? Zod supports asynchronous validation through .refine() by returning a promise.
  const UsernameSchema = z.string().min(3).refine(async (username) => {
    const res = await fetch(`/api/check-username?username=${username}`);
    const data = await res.json();
    return data.available;
  }, {
    message: "Username is already taken",
  });
You’ll need to use await schema.parseAsync(data) instead of the synchronous .parse() method when working with async refinements.
Transforming Data with Zod
Zod can also transform validated data before it’s returned using .transform(). This is useful for normalizing input, such as trimming whitespace or converting strings to dates.
  const TrimmedString = z.string().transform(val => val.trim());

  const StartDateSchema = z.string().transform(val => new Date(val));
Chaining validation and transformation makes your input-handling logic declarative and predictable. For example, you could validate a string as a valid date and return it as a Date object in one step:
  const NormalizedDateSchema = z.string().refine((val) => !isNaN(Date.parse(val)), {
    message: "Invalid date",
  }).transform(val => new Date(val));
These features allow you to handle most of the real-world validation scenarios, from nested structures and custom logic to async validations and data preprocessing, while keeping your types in sync with the runtime behavior.
Conclusion
Validation is at the heart of building reliable TypeScript applications, whether you’re validating user input, API responses, or internal data. Zod shines in this area with its TypeScript-first design, offering both runtime safety and static type inference in a single, elegant package. Its powerful features, from schema composition and custom refinements to async validation and transformations, make it an indispensable tool for developers who value both correctness and maintainability.
Still, even with strong client-side validation, server-side checks remain essential for data integrity and security. If you want a simpler way to enforce validation rules without writing repetitive code, Formspree provides built-in, customizable server-side validation that integrates seamlessly with modern web forms.
Want to dive deeper into backend best practices? Read our guide: Top Methods for Server-Side Validation with Examples.